Since a lot of school have their graduation ceremony soon I decided to share with you how to make your own graduation cap. I made one for me and one for my best friend for our high school graduation. They are easy to make but still beautiful and unique.
All you need:
> A harder cardboard
> A softer cardboard
> Pen, Scissors, Stapler, Glue
> Decorative materials
 1. Start by cutting a square from the hard cardboard. You can choose your own measurements but 24×24 cm was a good size for me.
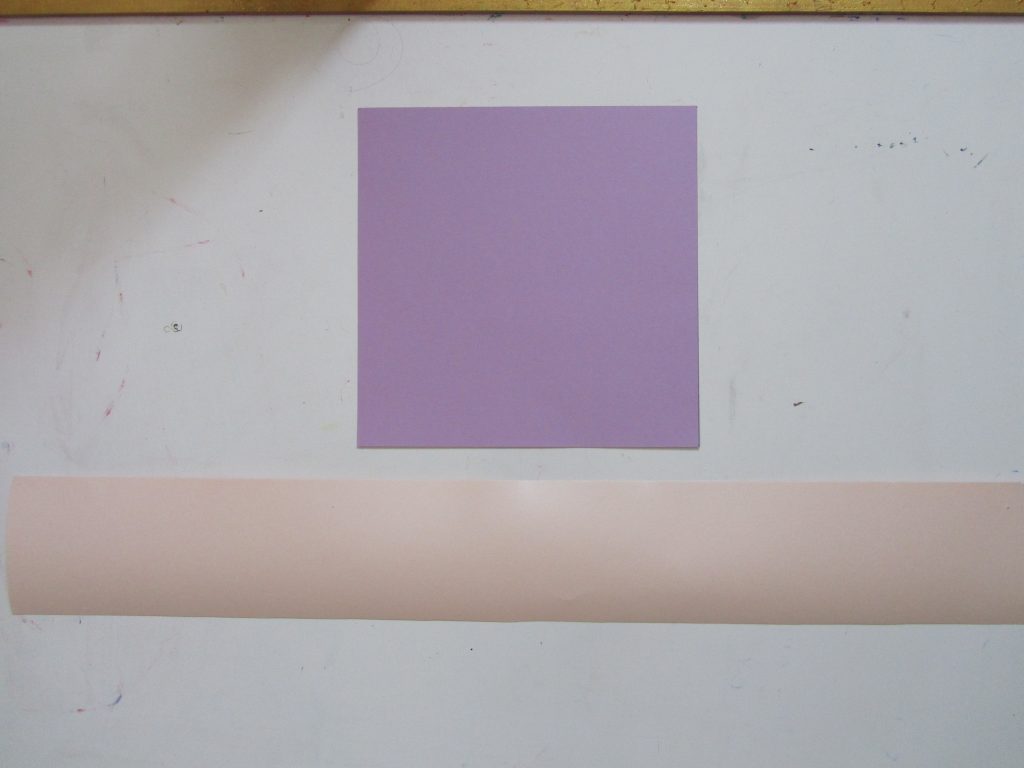 2. Then cut a long piece from the softer cardboard. From this we will make the circle base for our cap. Mine was 7 cm wide and length is up to you and your head size.
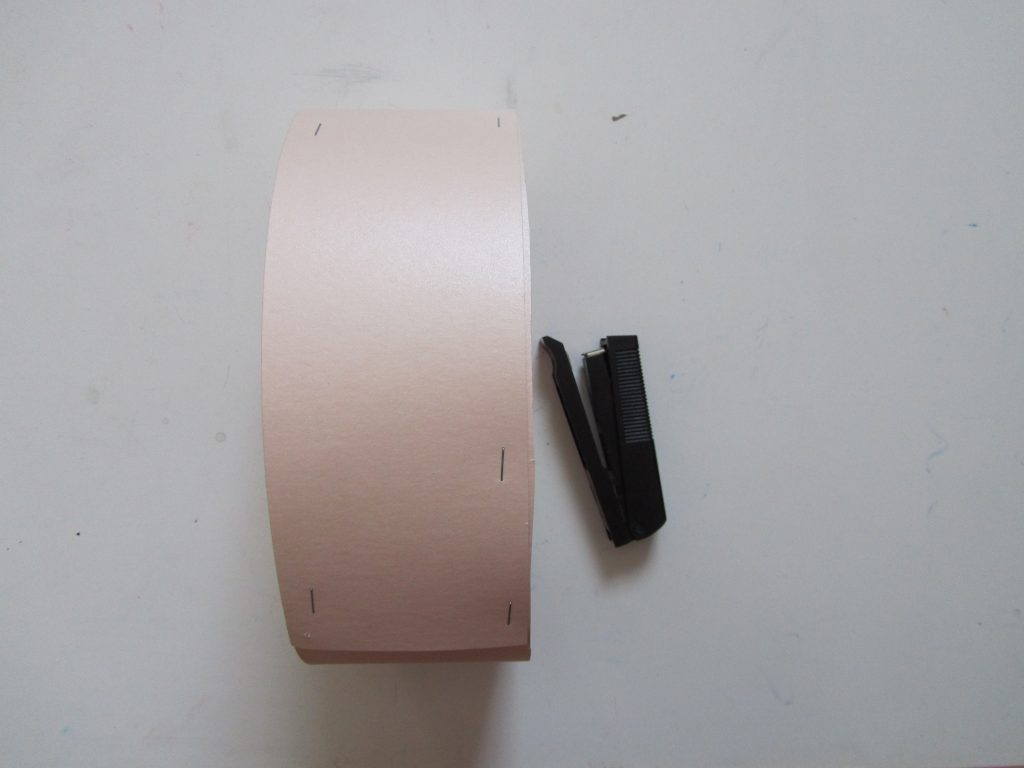 3. Fold the long piece in a circle shape and put it on your head. Loose and tight it till you have your perfect size. Then quickly staple it. That is not the most neat way but it`s quick and easy.
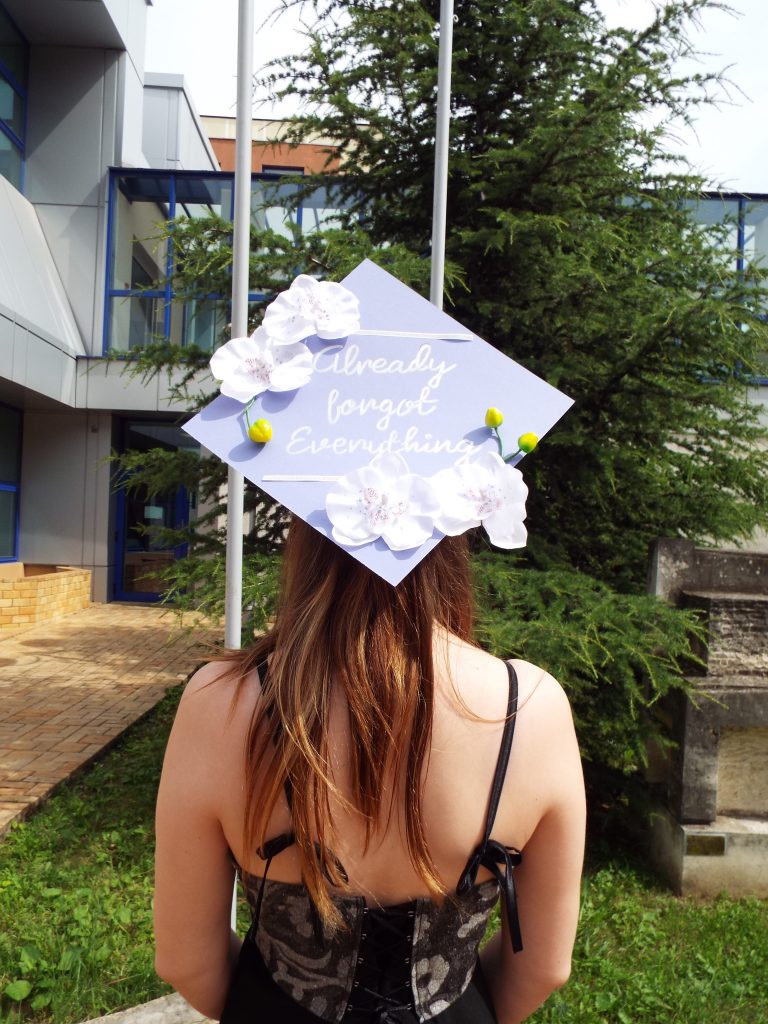
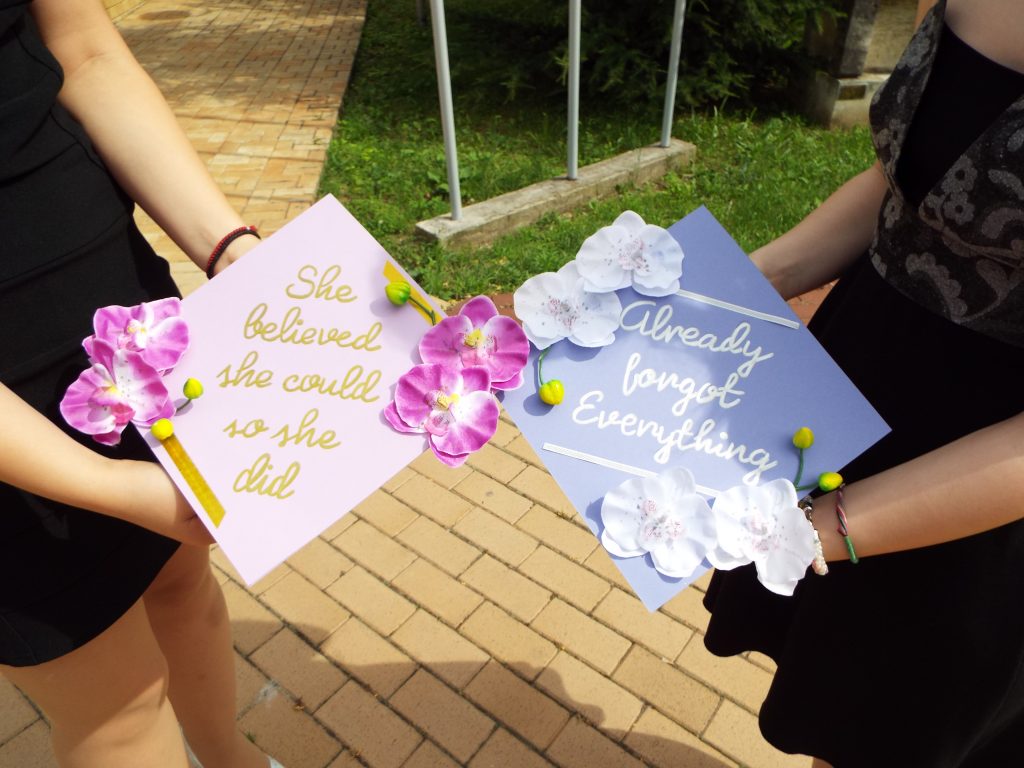
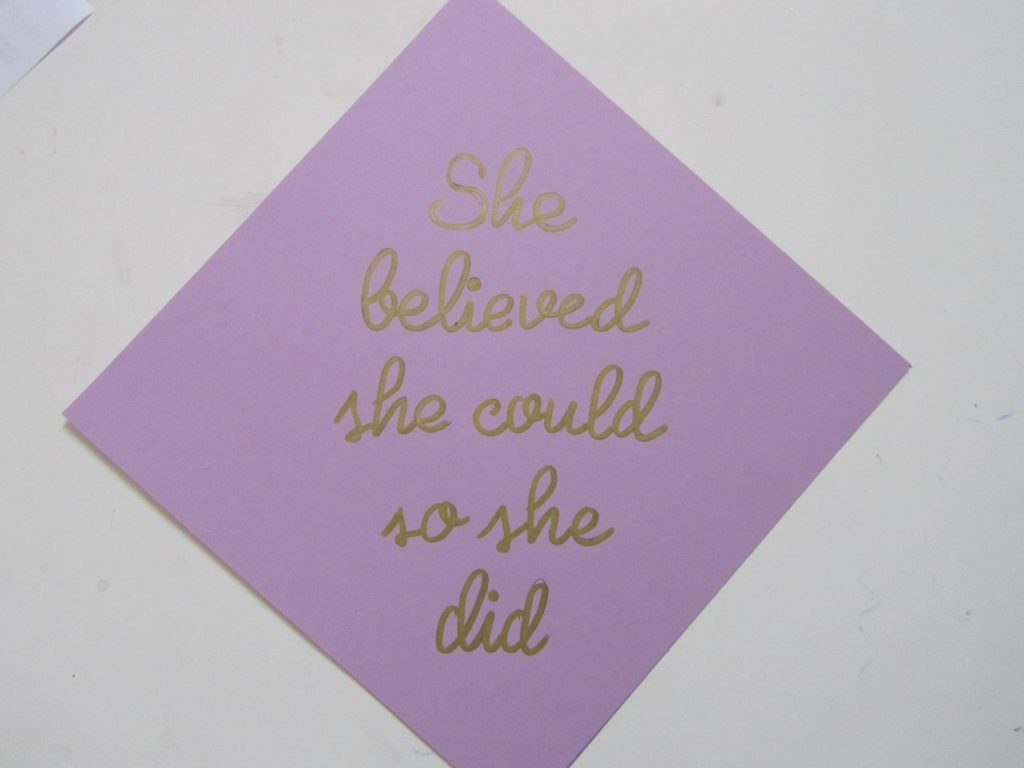 4. Now you can add the text. Make sure that the square piece is in a diamond shape when you write and decorate. You can opt for something inspiring, like my friend did, or choose something funny, like me. To imitate a good handwriting you can watch my YouTube video in which I am showing my trick.
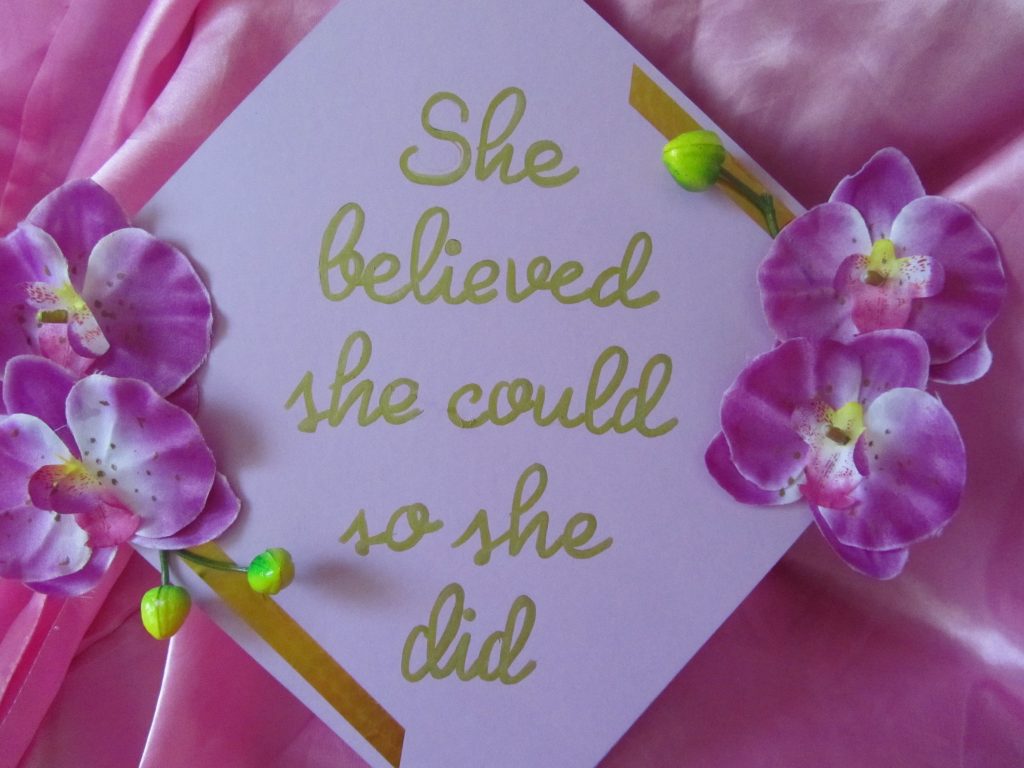
 5. Add decorative elements. I glue on some fake flowers and washi tape all in one colour scheme.
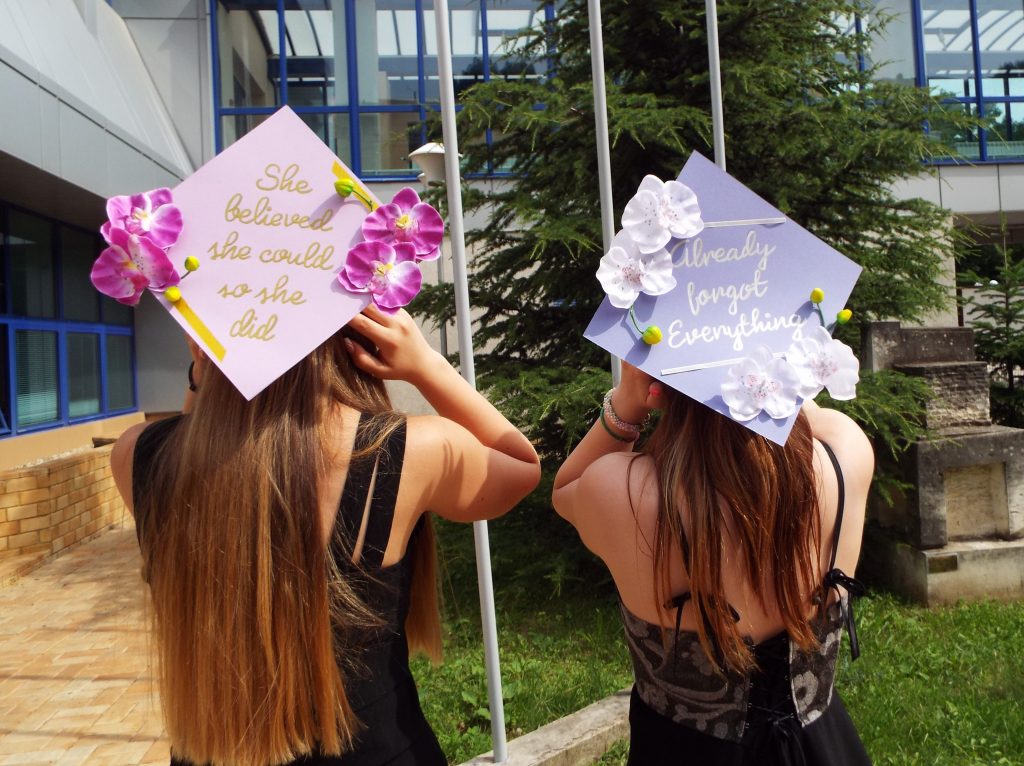
 6. Finally, glue the circle base to the diamond. Turn the diamond with the backside. Apply some glue on the rim of the circle and put it over the diamond. Then turn it upside down so it can glue more quickly and steady. And that`s it!

And don`t forget to share with me your recreation on IG with #yhour
and my FB page!