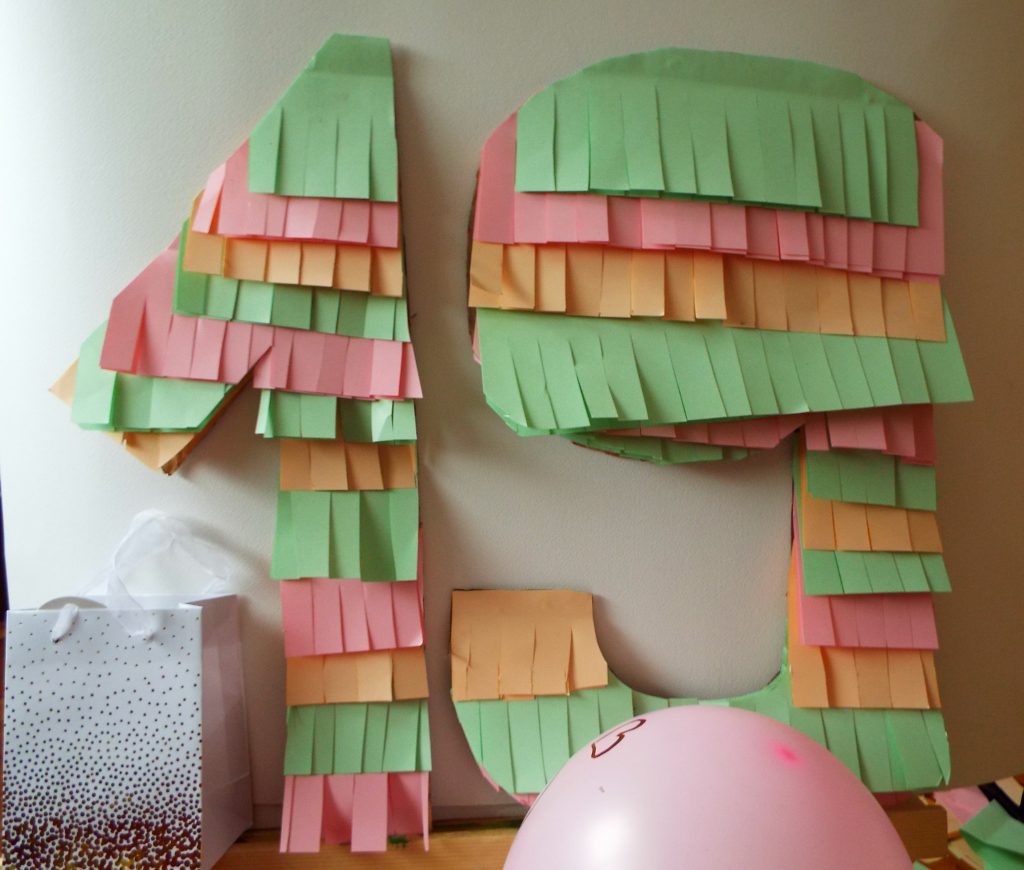
One of my goals is to organize a big party with plenty of DIYs for my birthday someday. Every year I get closer and closer. This time I made cute and fun decorative birthday numbers.
All you need:
> Cardboard
> Colourful paper
> Scissors
> Glue or stapler
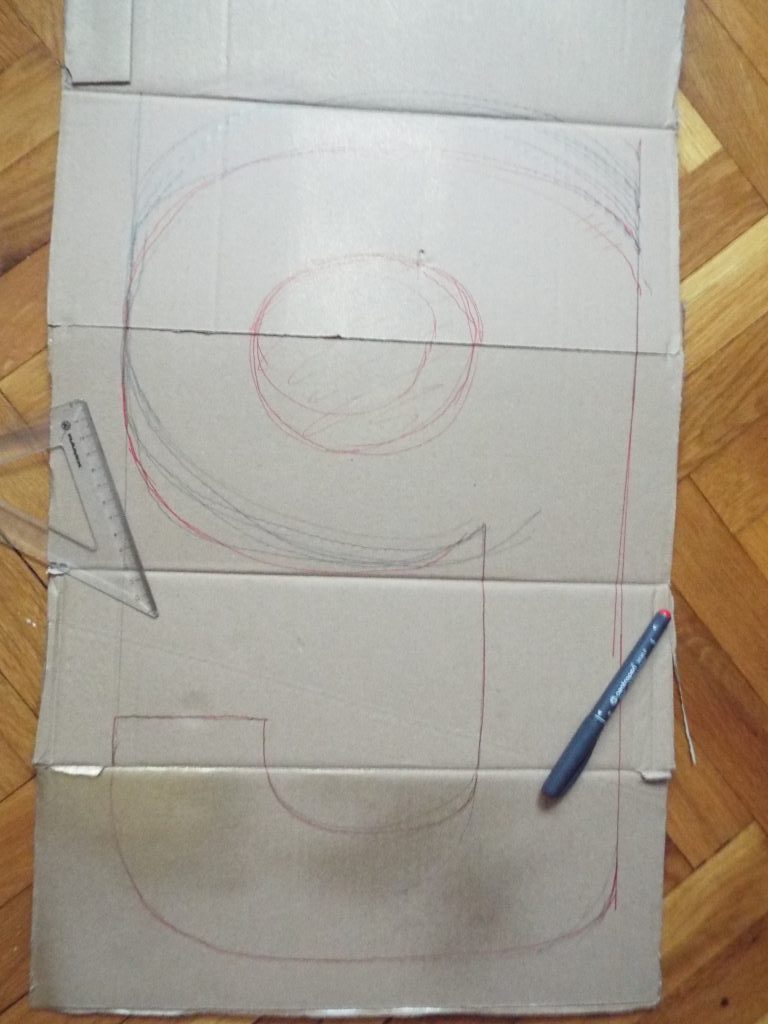 1. Outline the number on a piece of cardboard. I wanted to make large one so I use a cardboard from a box. If you will make two (or hopefully three!) numbers make sure they are with equal size. And if your cardboard is not large enough do not worry! You can attach pieces of the cardboard so you can make a bigger one. You can do that with tape or stapler.
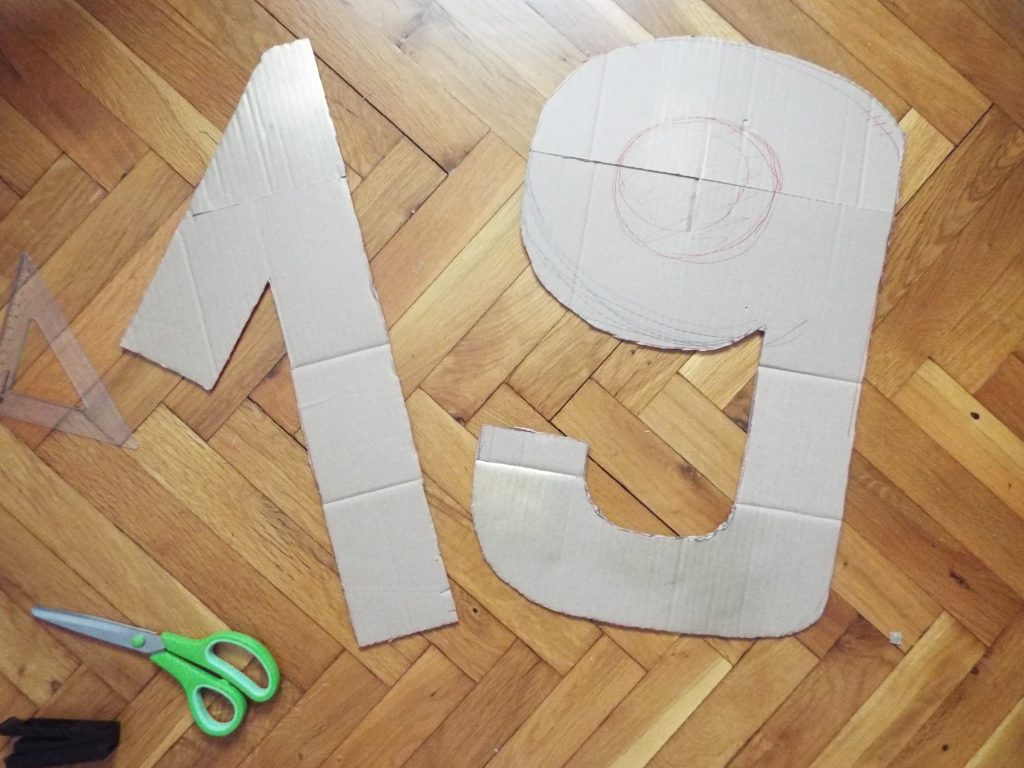 2. Then cut it out. Keep in mind that the thicker your cardboard is the harder it is to cut. That is why I work in sections.
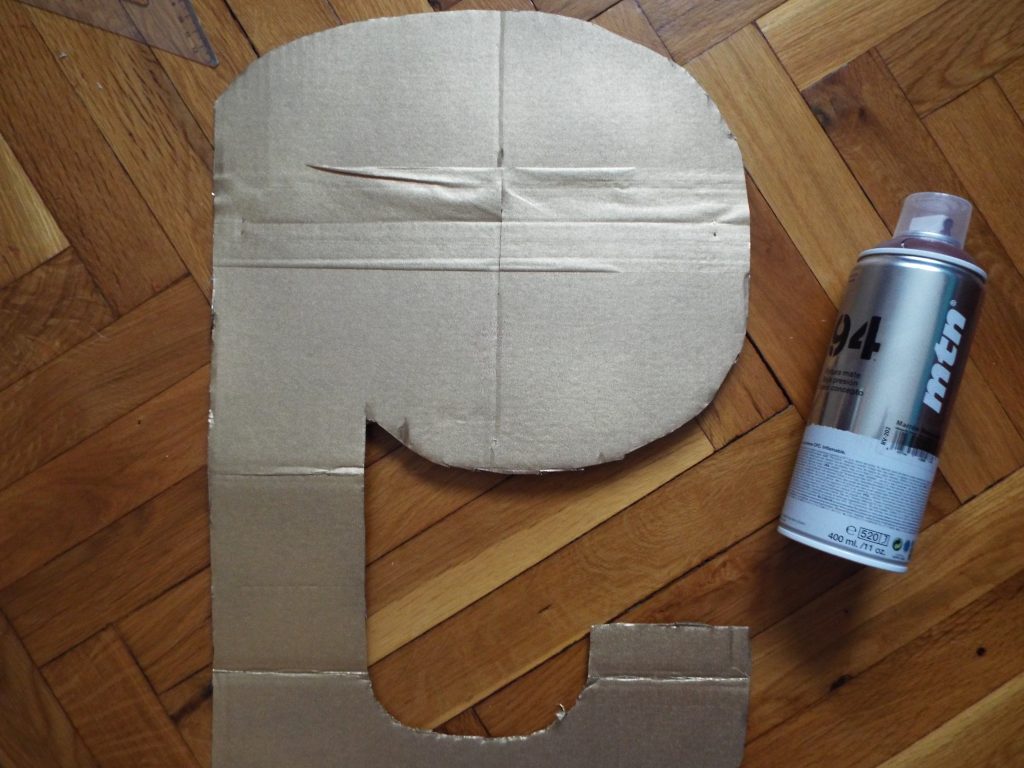 3. You can paint the back of the numbers to look better.
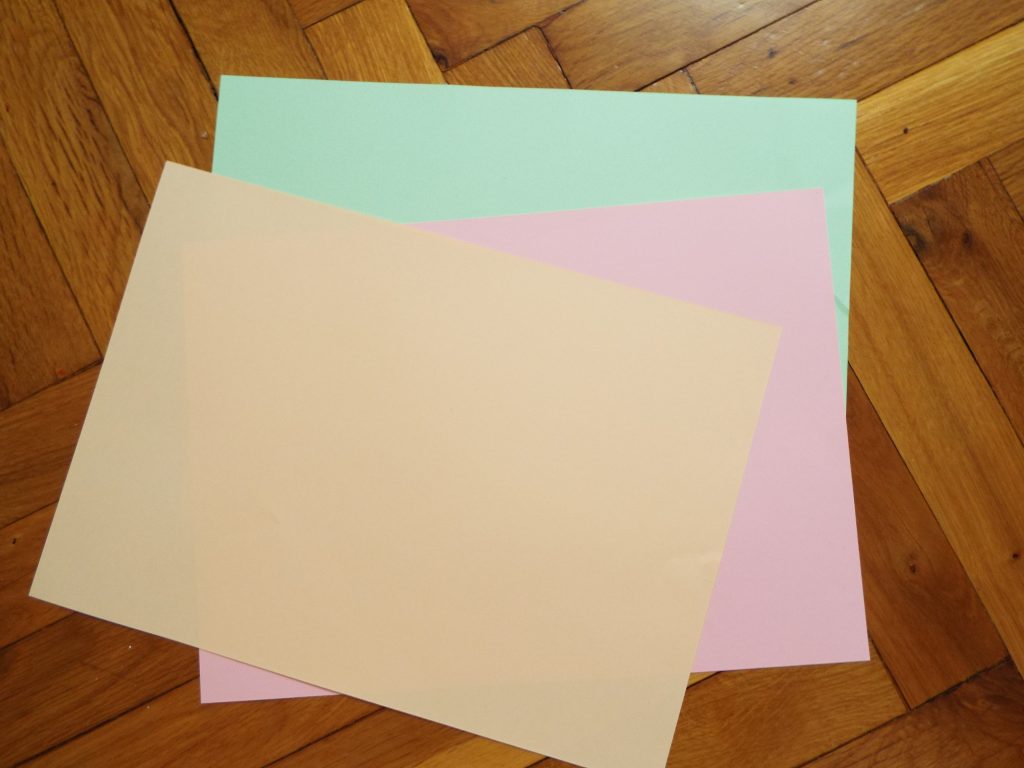 4. While waiting the paint to dry it is time to decorate. Choose the colours you want to use. I opt for pastel green, pink and orange.
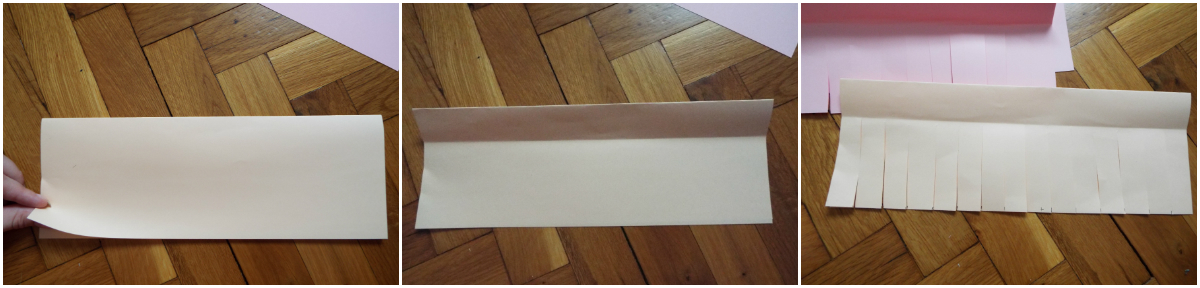 5. Fold one of the sheets in the half. Then fold again about 2.5 cm. With scissors start cutting fringes along the length of the page. That way you will get two rolls of fringes.
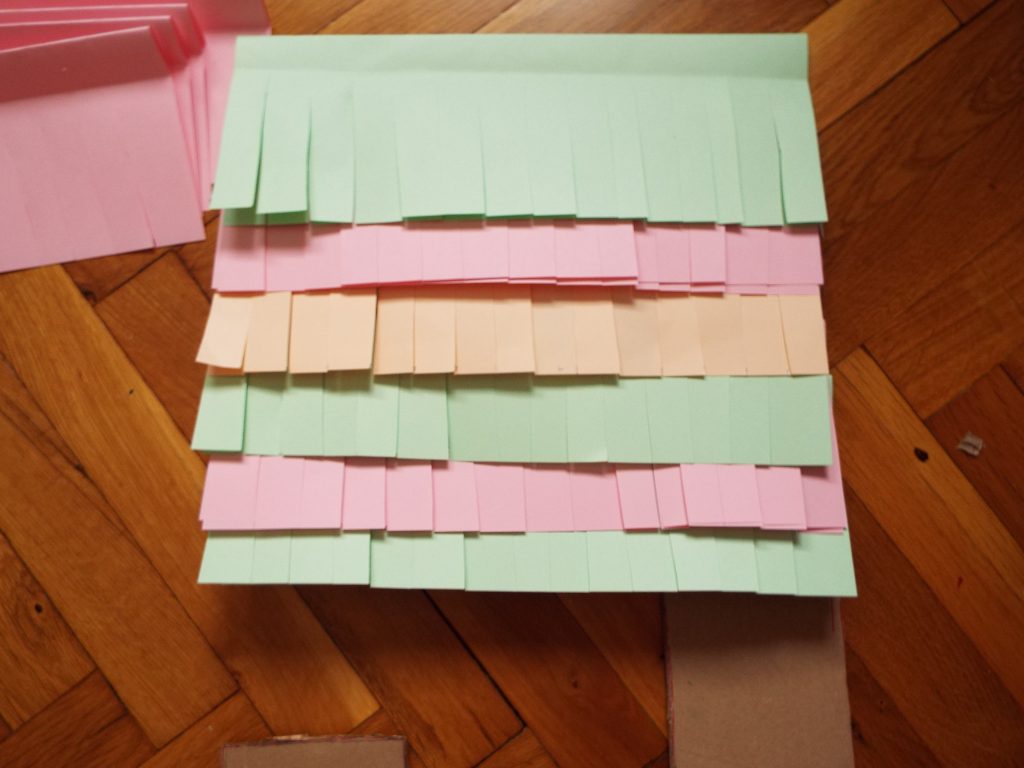 6. Now start placing the fringed sheet on the cardboard. Put the glue only on the folded part. You can also use a stapler. Make sure to place the pages so only the fringes can be visible.
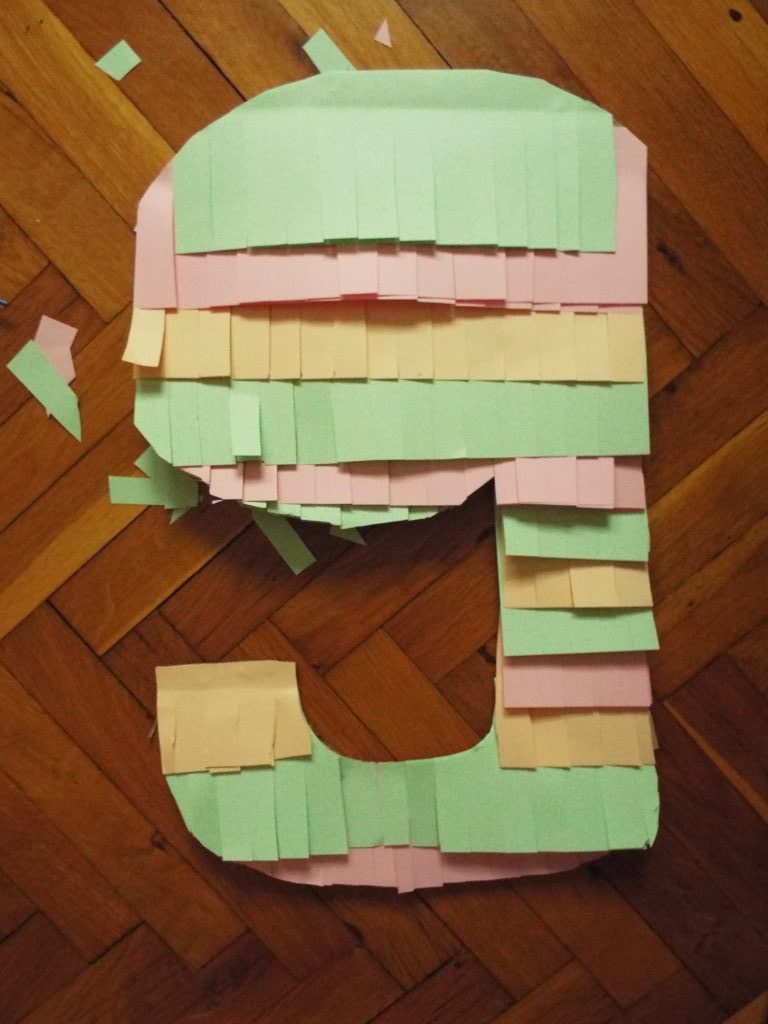 7. Then turn the number backwards and cut of the exes parts to make the shape and you are done!
Don`t forget to share with me your recreation on IG with #yhour
and on my FB page!