I am continuing giving you ideas for Christmas card, perfect addition for a present. This time I am showing you an easy card project, representing poinsettia flower.
All you need:
> Template for the poinsettia
> Red and green paper
> Cardstock for the base
> Design paper
> A piece of ribbon
> A golden marker/paint
 1. Start by cutting out the elements from the template, which you can download HERE.
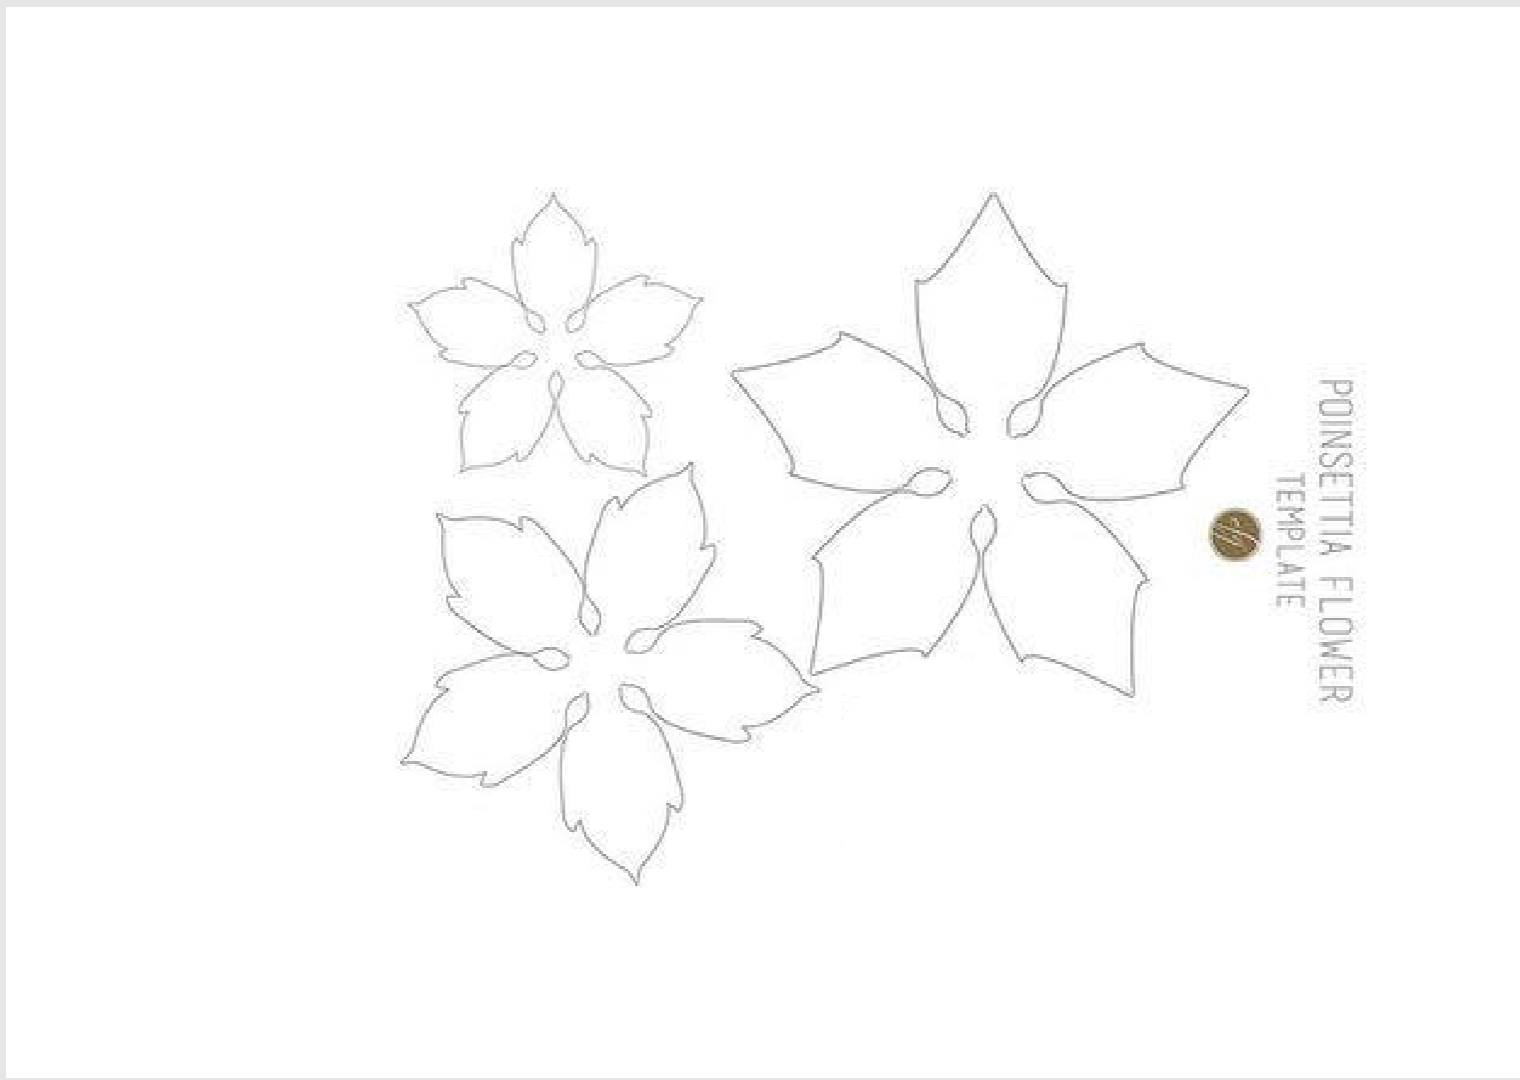
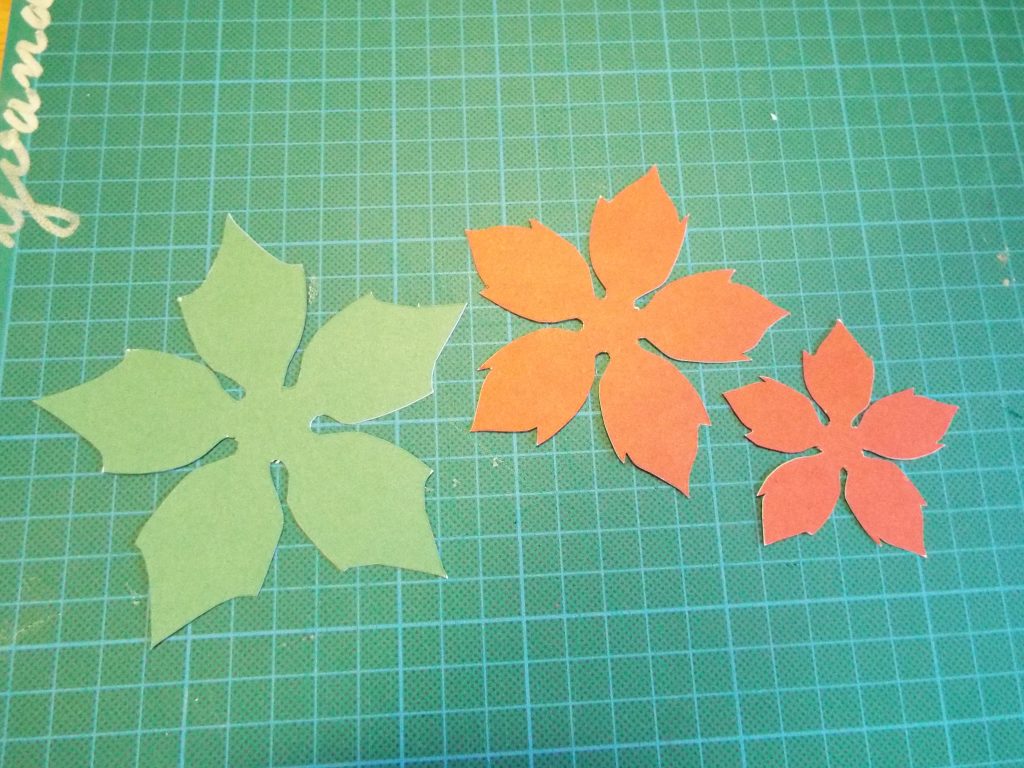 2. Outline the parts on a paper, like the largest one to be in green colour, and the two others – red.
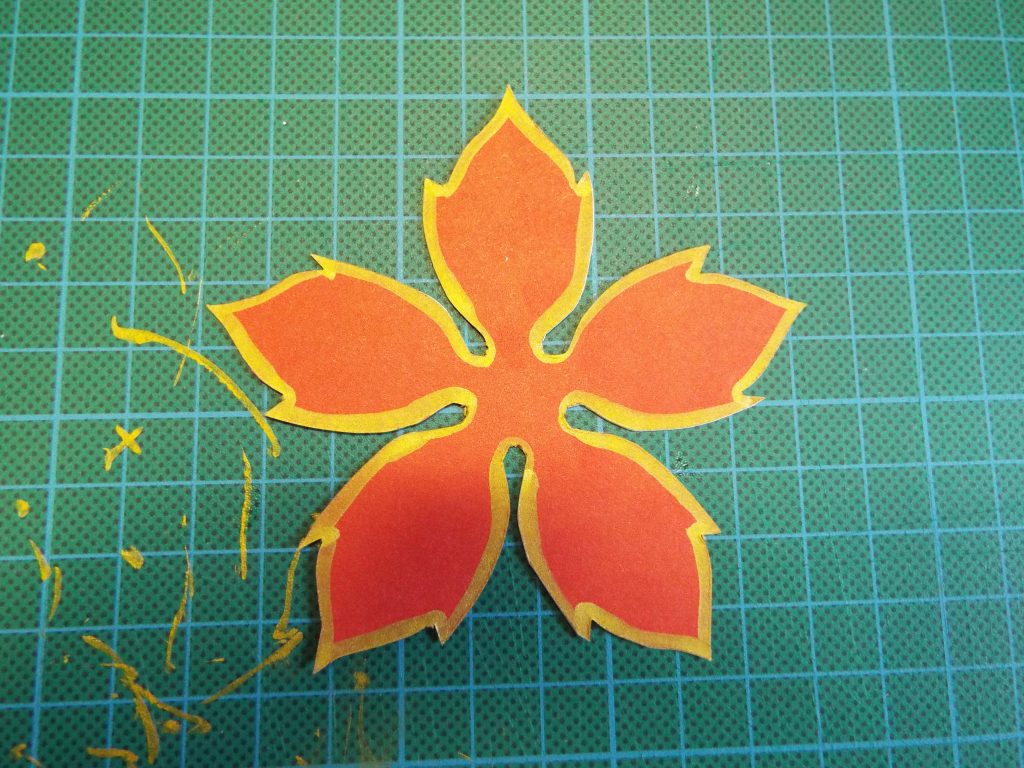 3. Colour the edges of the red parts with the golden marker or paint.
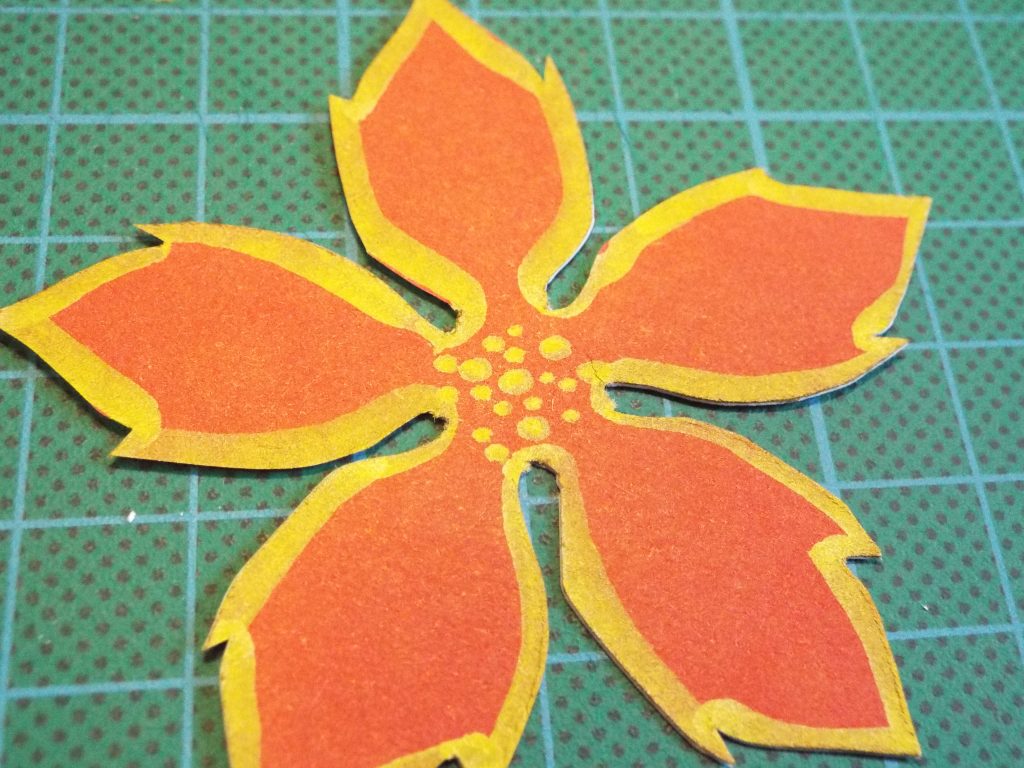 4.On the smaller part make some dots in the middle.
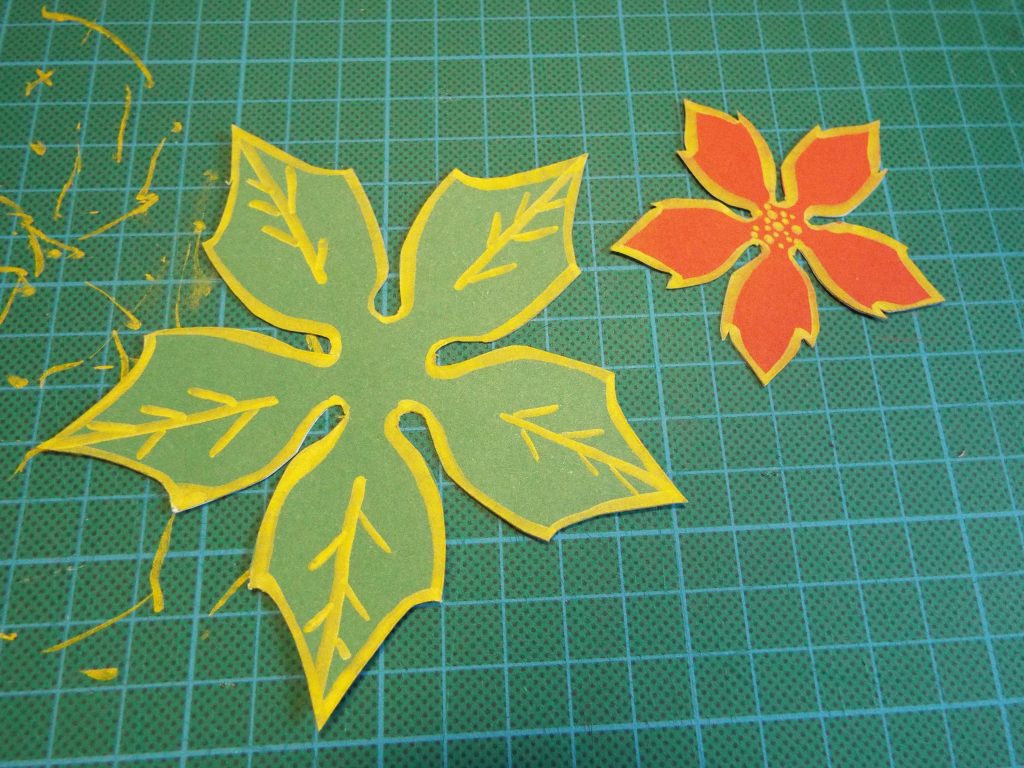 5. Repeat this step with the green element and add some veins, to represent real leaves.
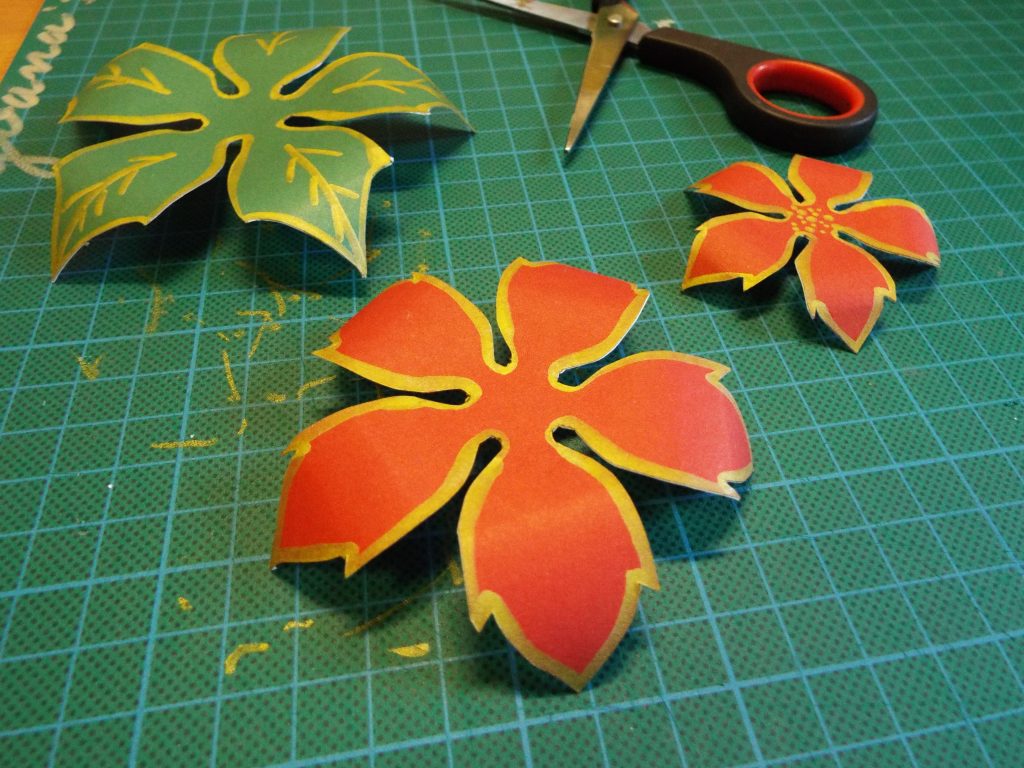 6. To make the flower looking 3D, curve the leaves and the petals with scissors.
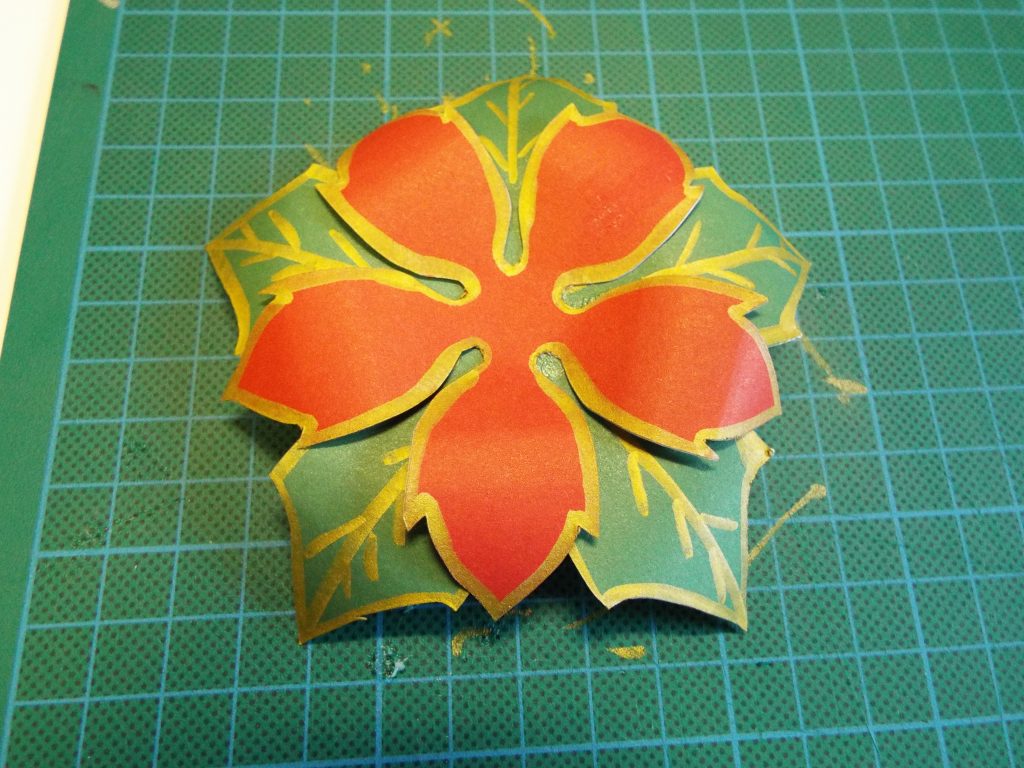 7. Connect the elements together, by applying glue only in the center. Make sure you are crossing them while doing this step.
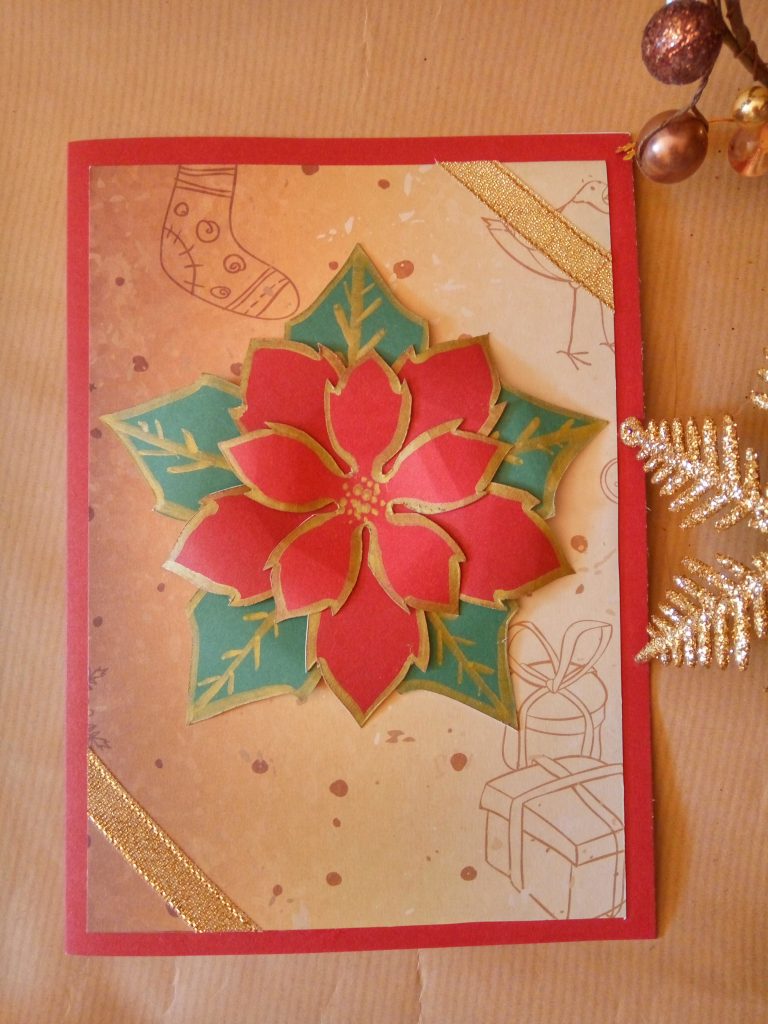
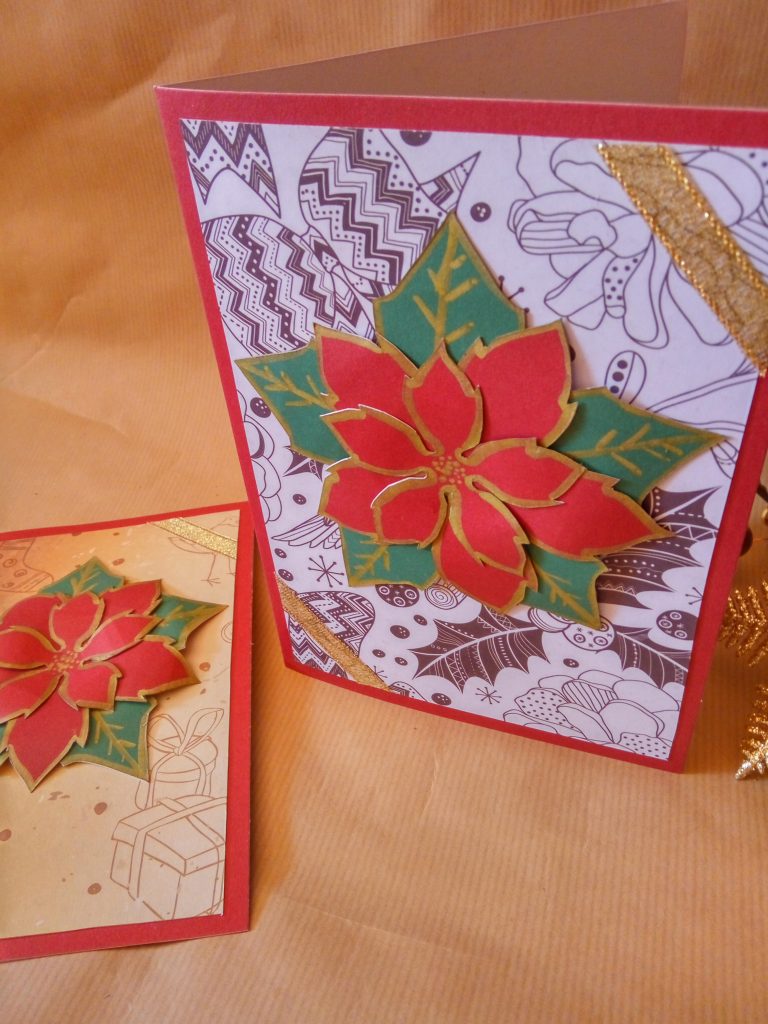
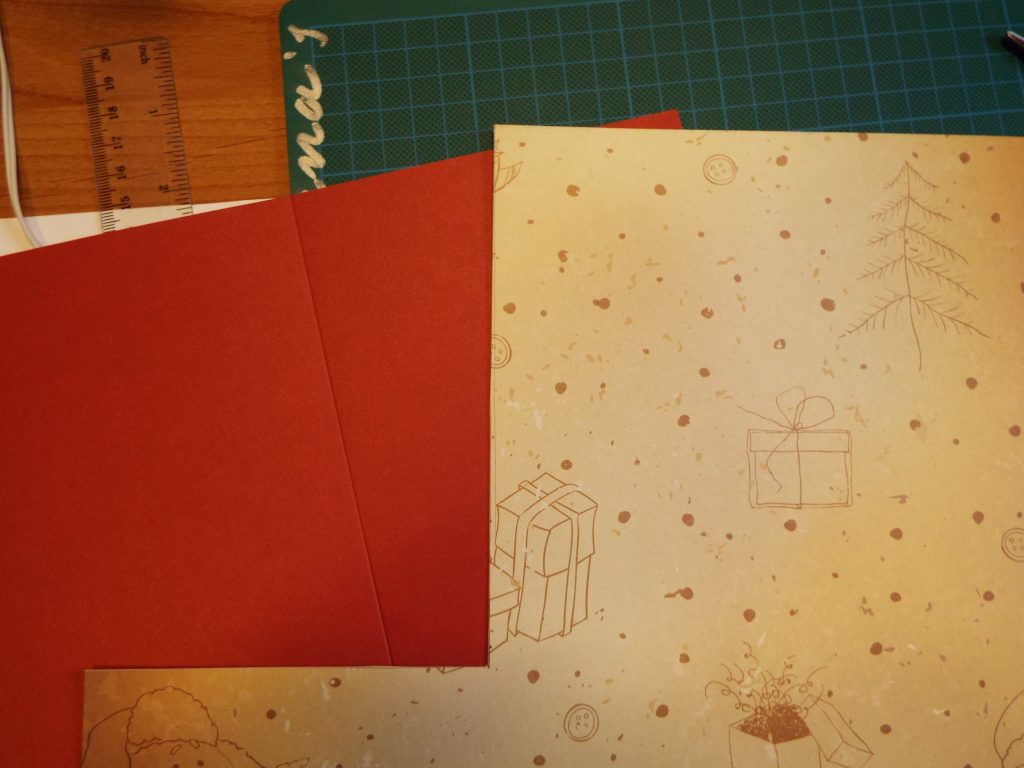 8. Now, choose colour for the cardstock base, as well as a design decorative paper.
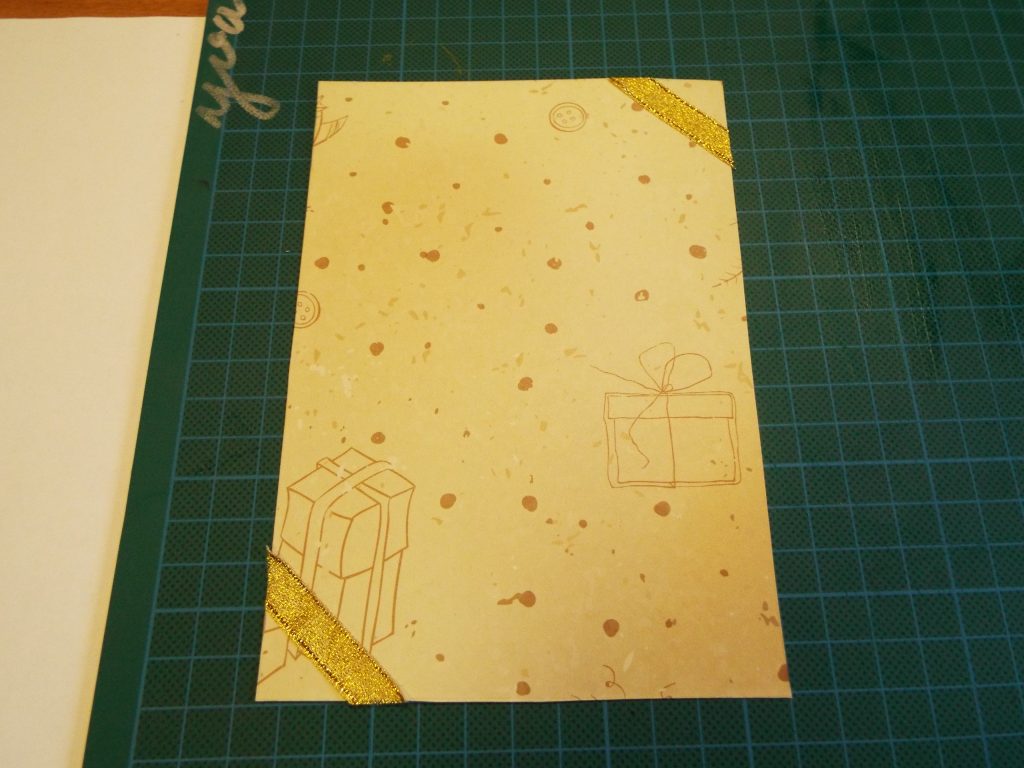 9.Cut a piece from the decorative paper, with size so when it’s placed on the base, to has 0.5 cm frame from each side. Then glue on a piece of ribbon on two opposite corners
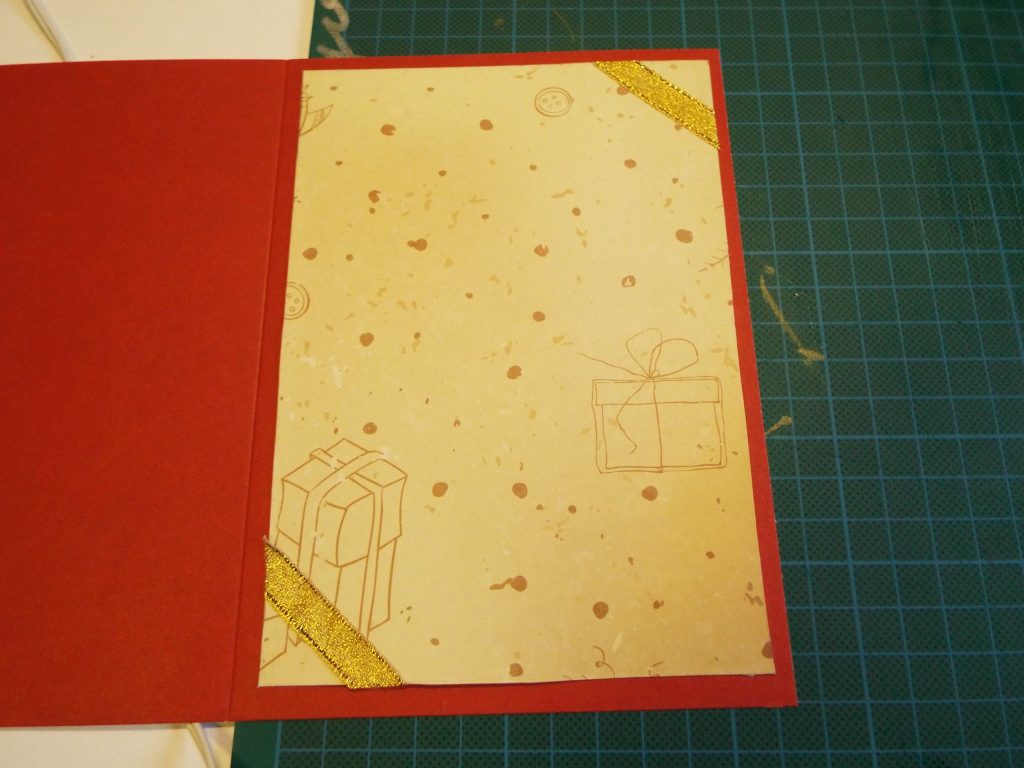 10. Glue on the base but before that .
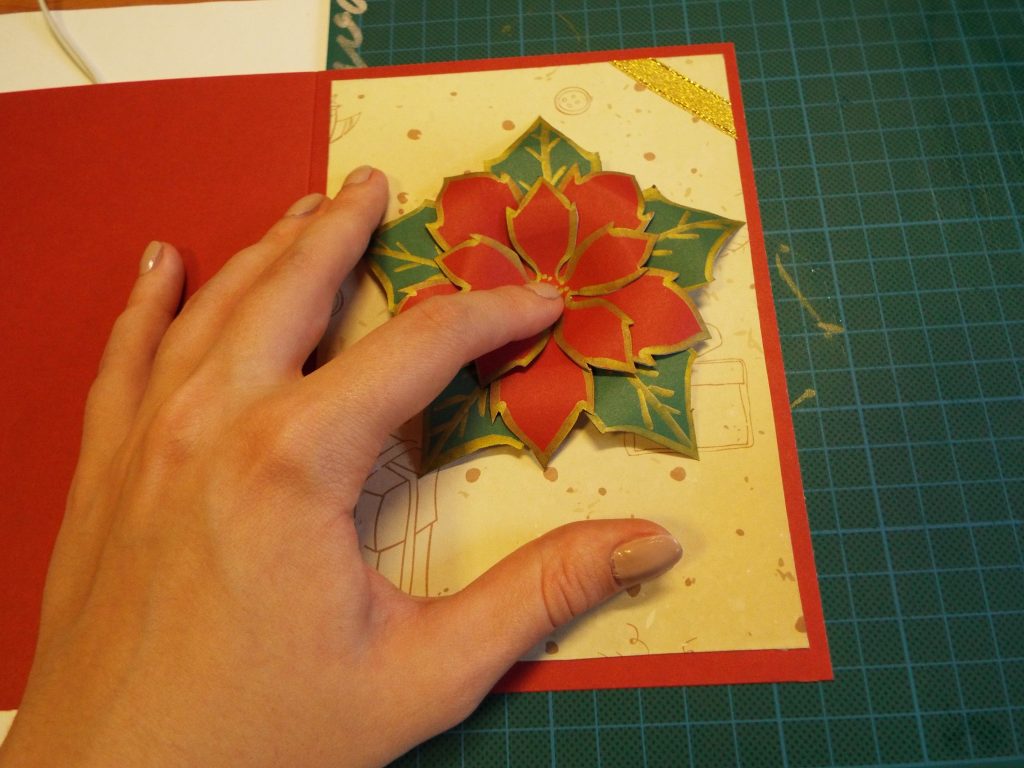 11. Finally, glue the flower at the center. And you are done!