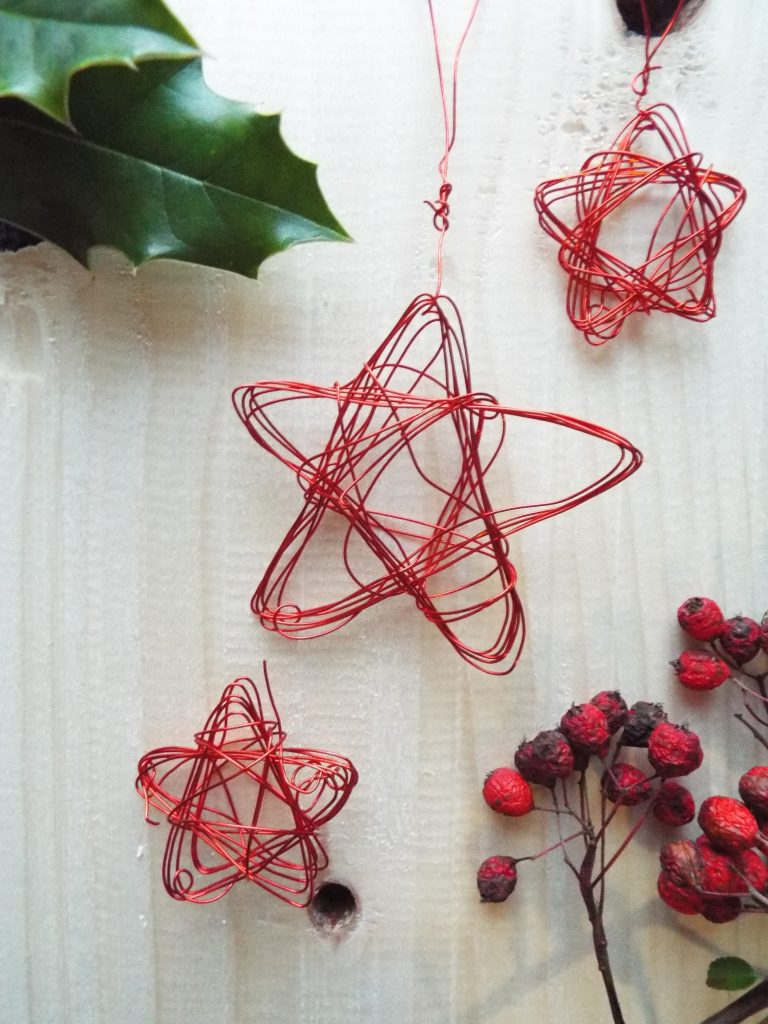
Christmas season is here and today I am sharing with you easy idea for your decoration. This easy DIY star ornament is also a perfect handmade addition for pre-Christmas presents.
All you need:
> A piece of wood
> Five nails and a hammer
> Colourful wire
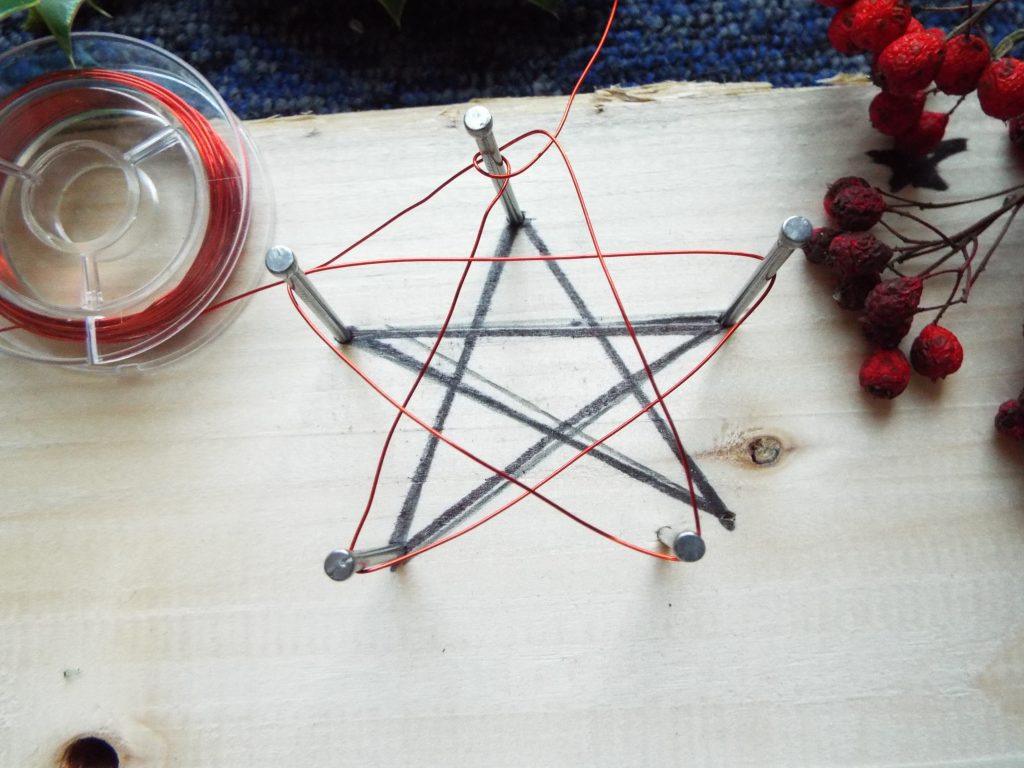
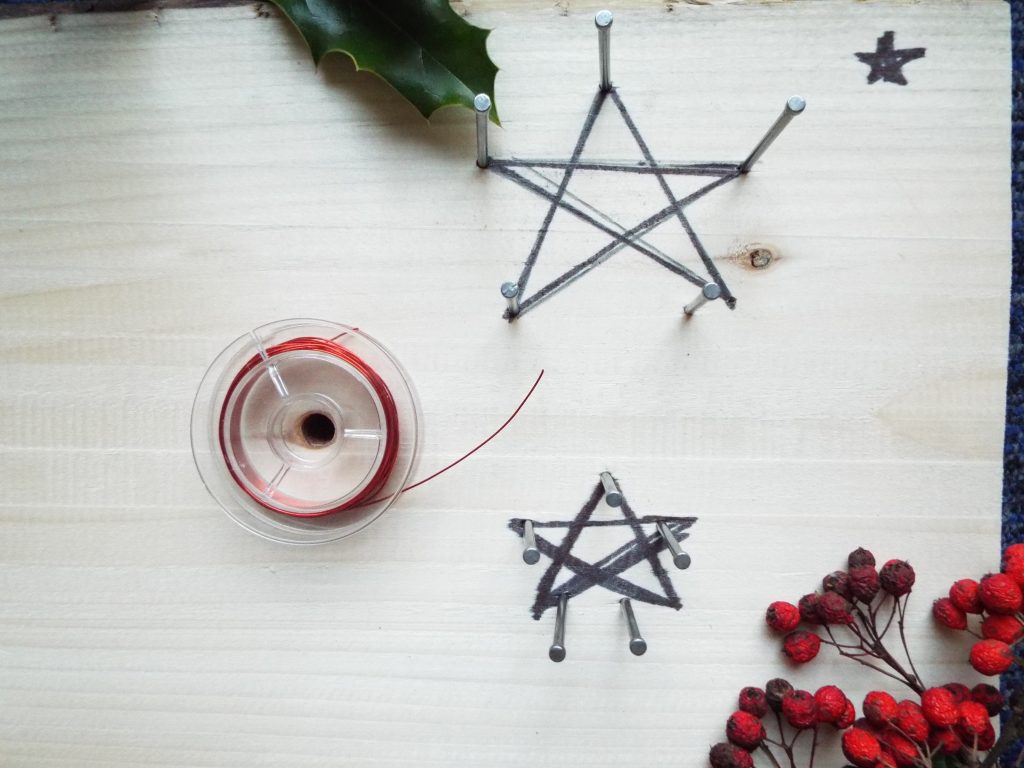 1. Your first step is to get ready. You should prepare this module/template of a star, that is going to help with the construction of the ornament.
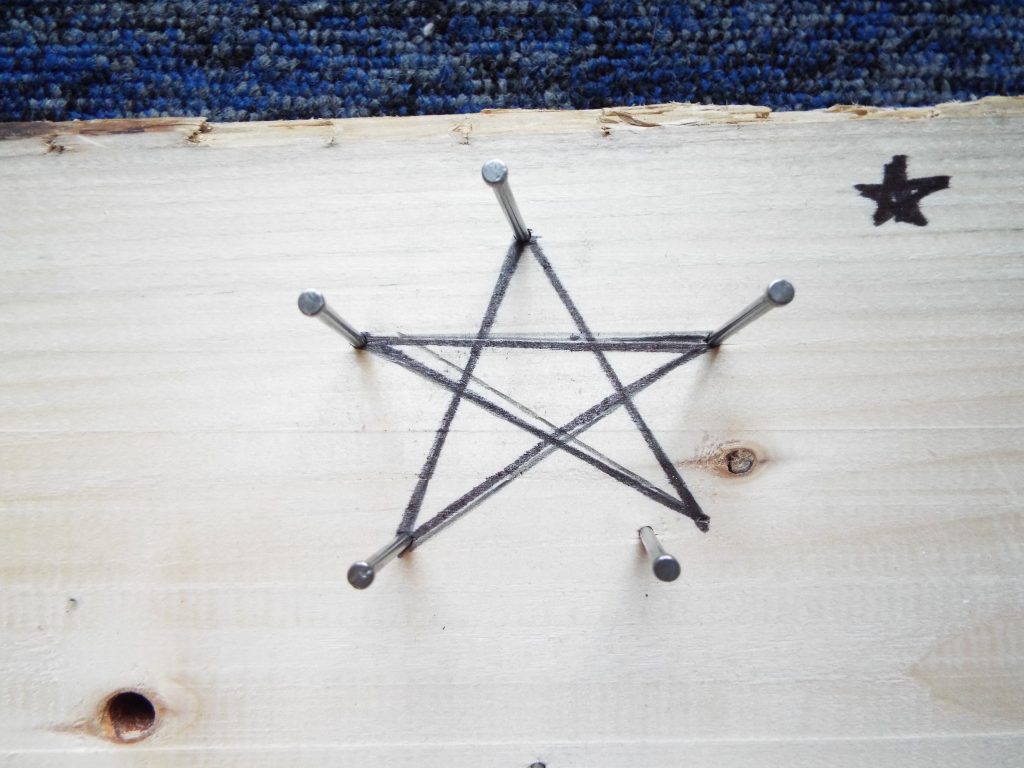 2. To do it, draw a star on the piece of wood, and hammer a nail on every end.
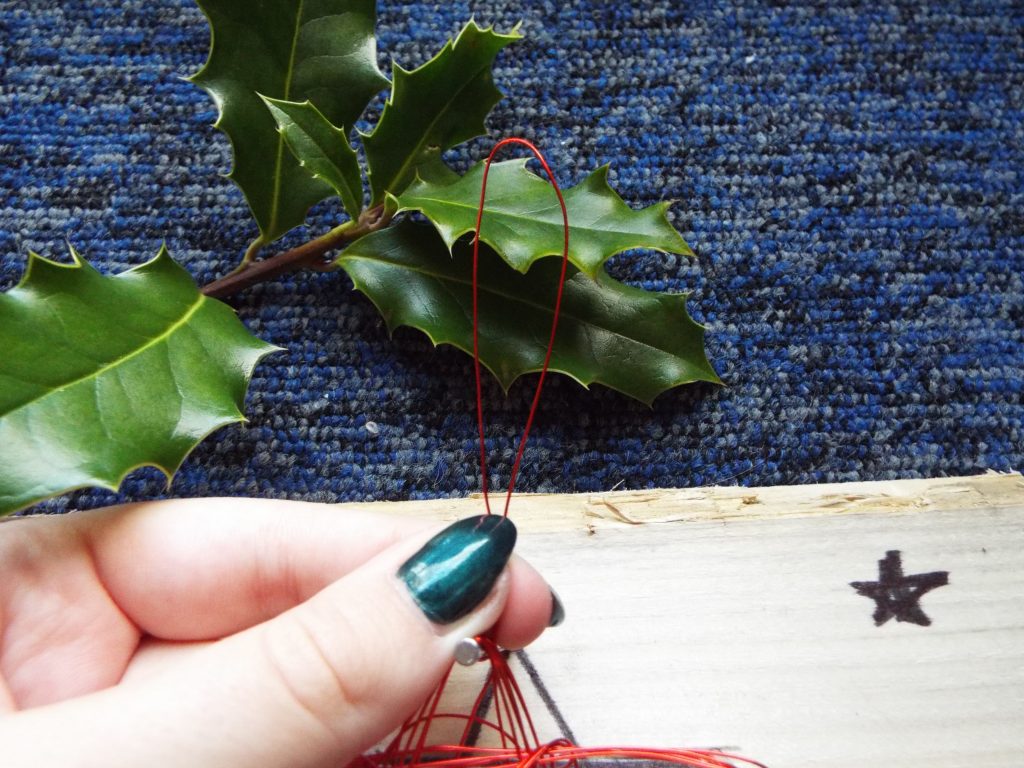
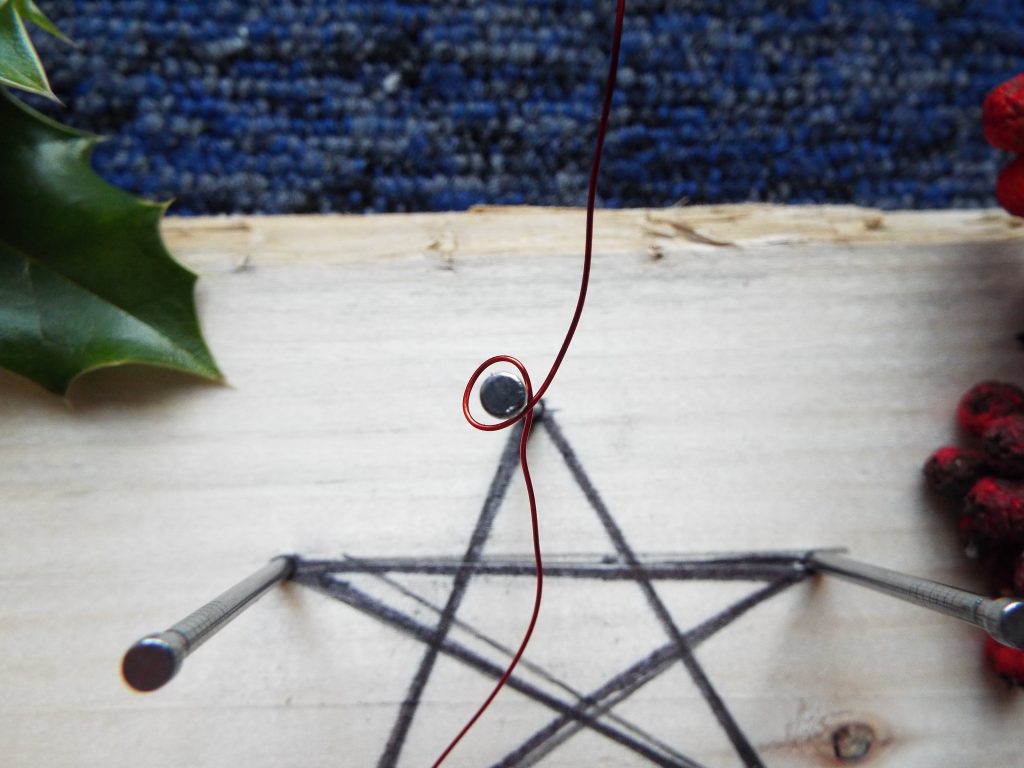 3. To start shaping the star, make a loop with the wire around the first nail, while leaving a few cm of the wire outside.
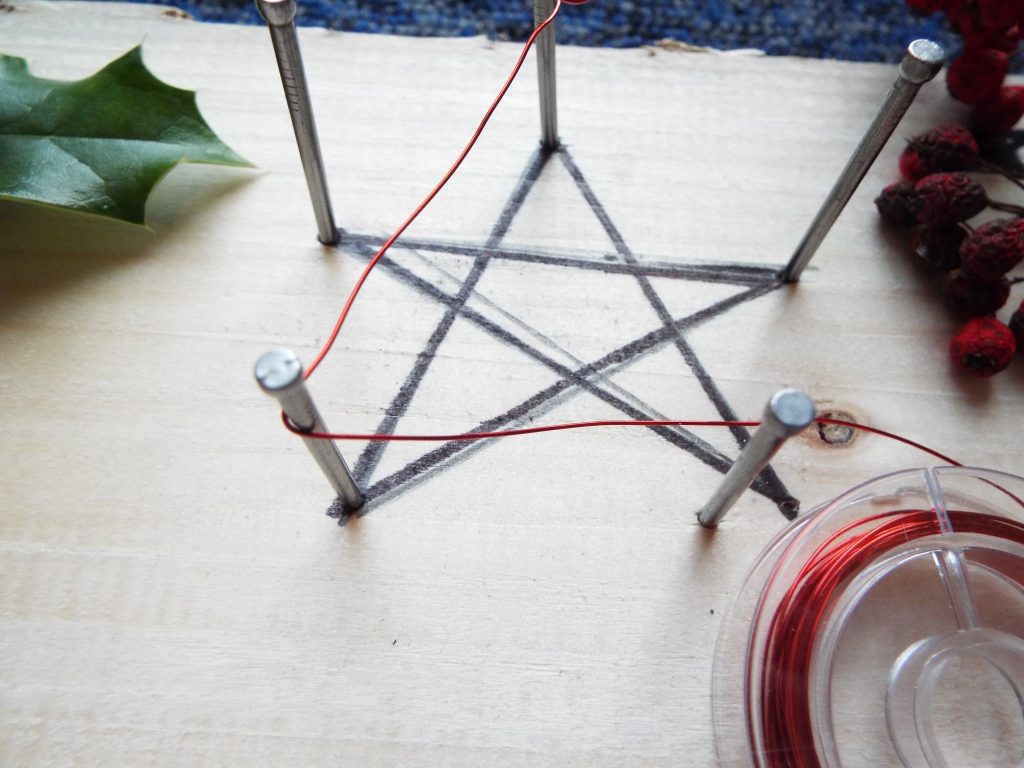 4. Start crossing the wire around every nail following the shape and the order.
 5. Do so till you have a complete star shape.
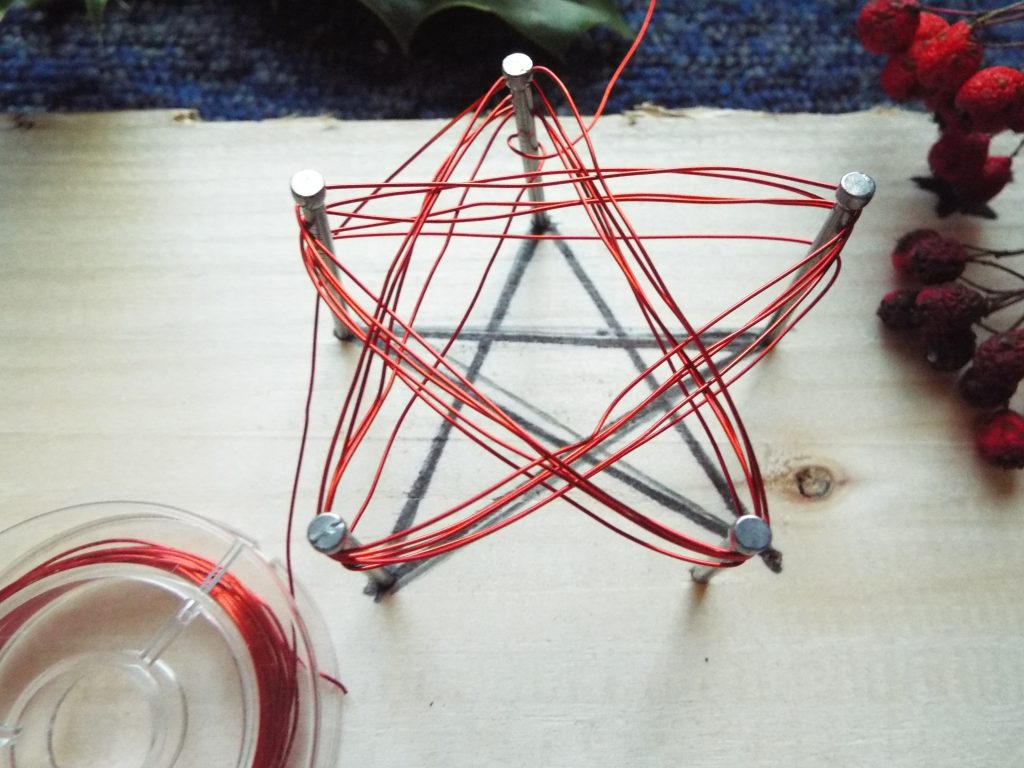 6. Repeat few times to get a nice thickness.
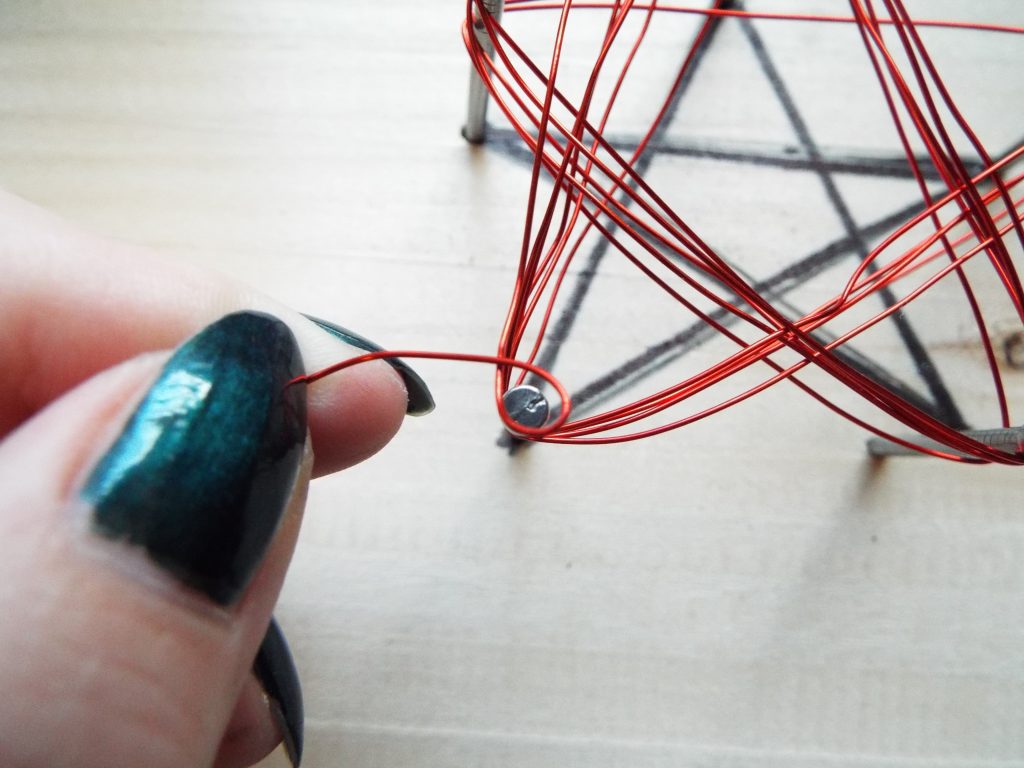 7. Finish by looping the wire around the last nail.
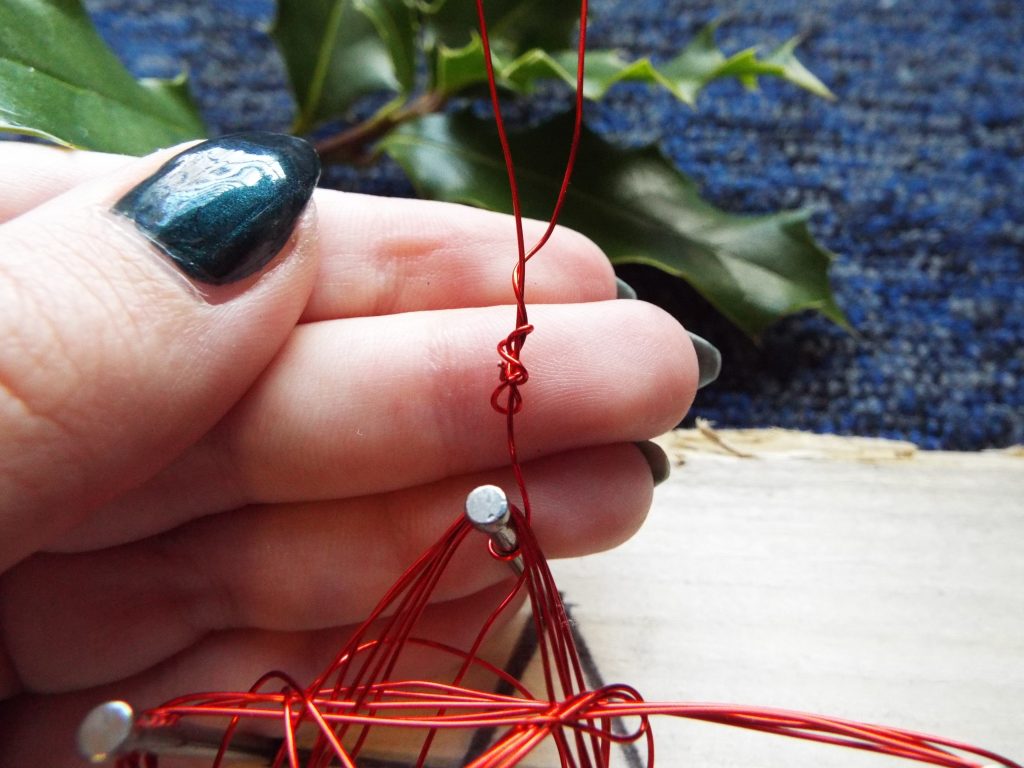
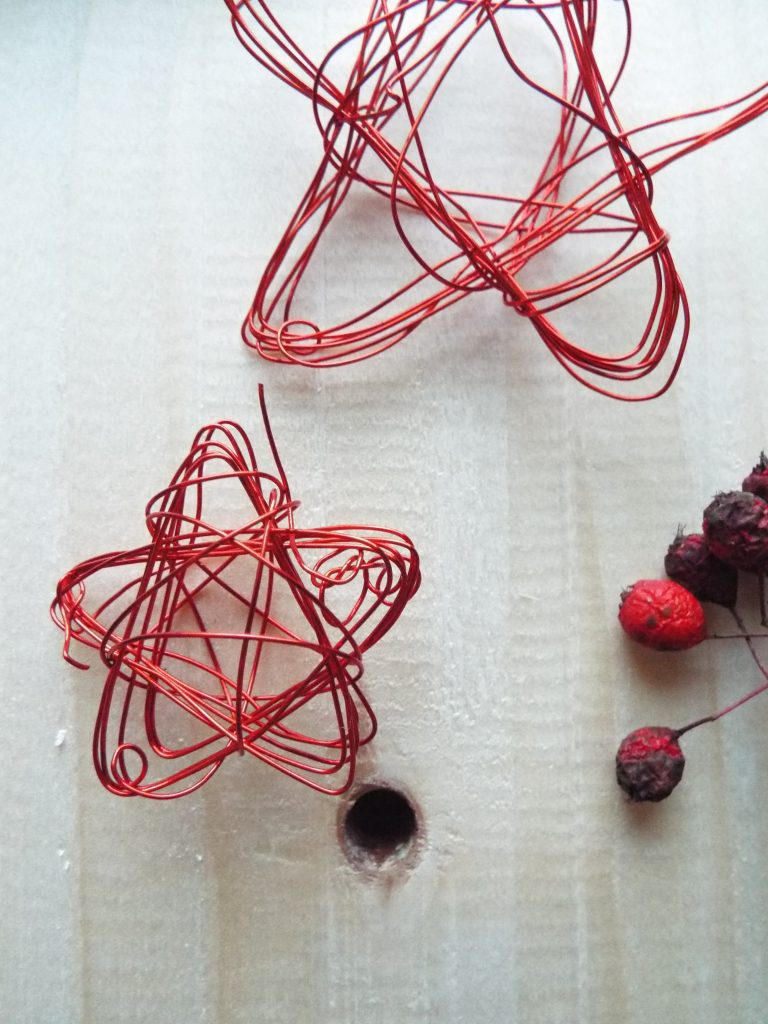
 8. Then proceed on crossing the wire in the middle but that time without using the nails. And finish by tighten the end of the wire, so it doesn’t loose shape later on.
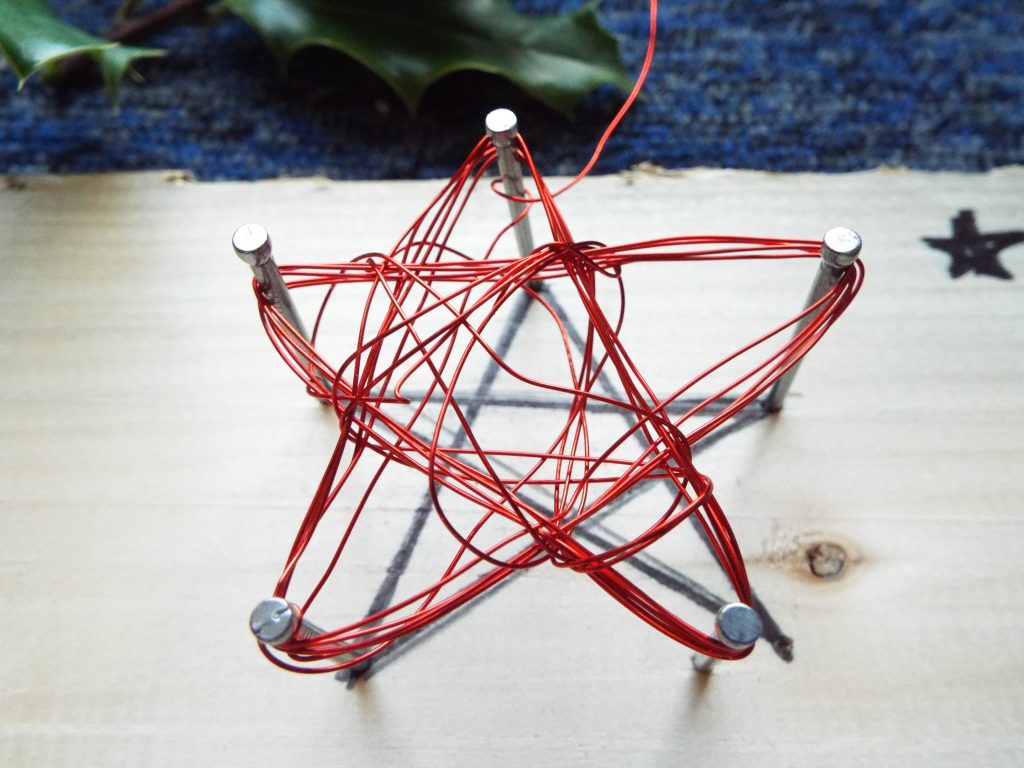
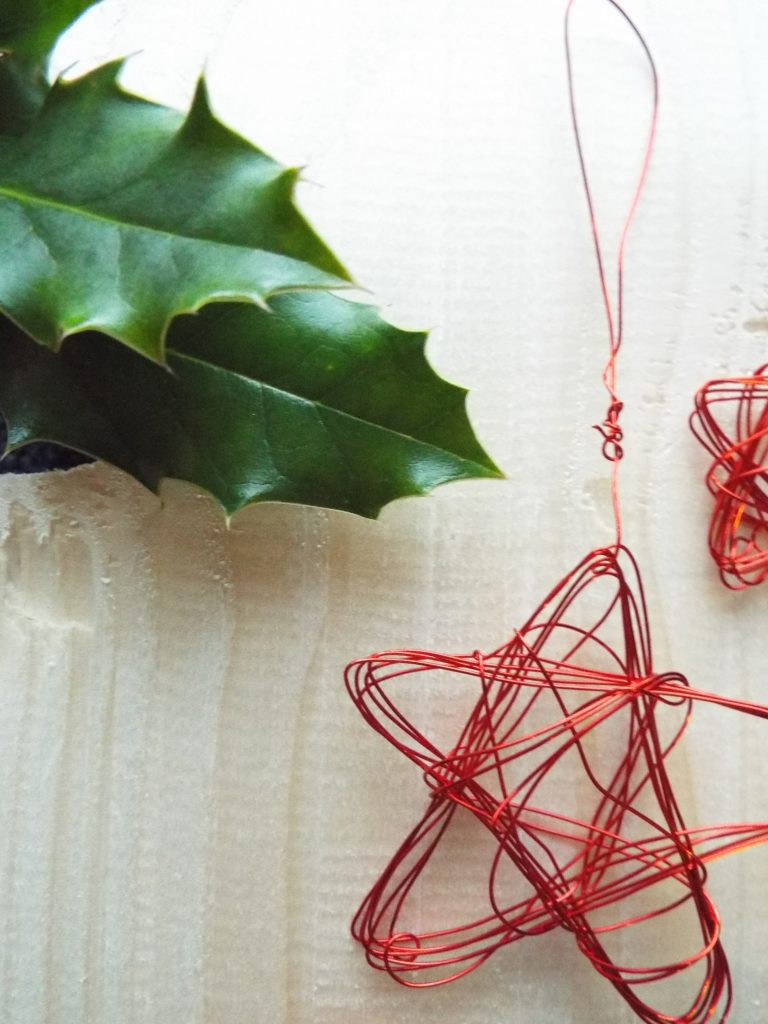
 9. When you are finish with the main star shape, move on to the piece of wire we left outside at the begging. Make a loop out with it by bending it in the middle.
 10. To secure the loop, tight the end around the base.
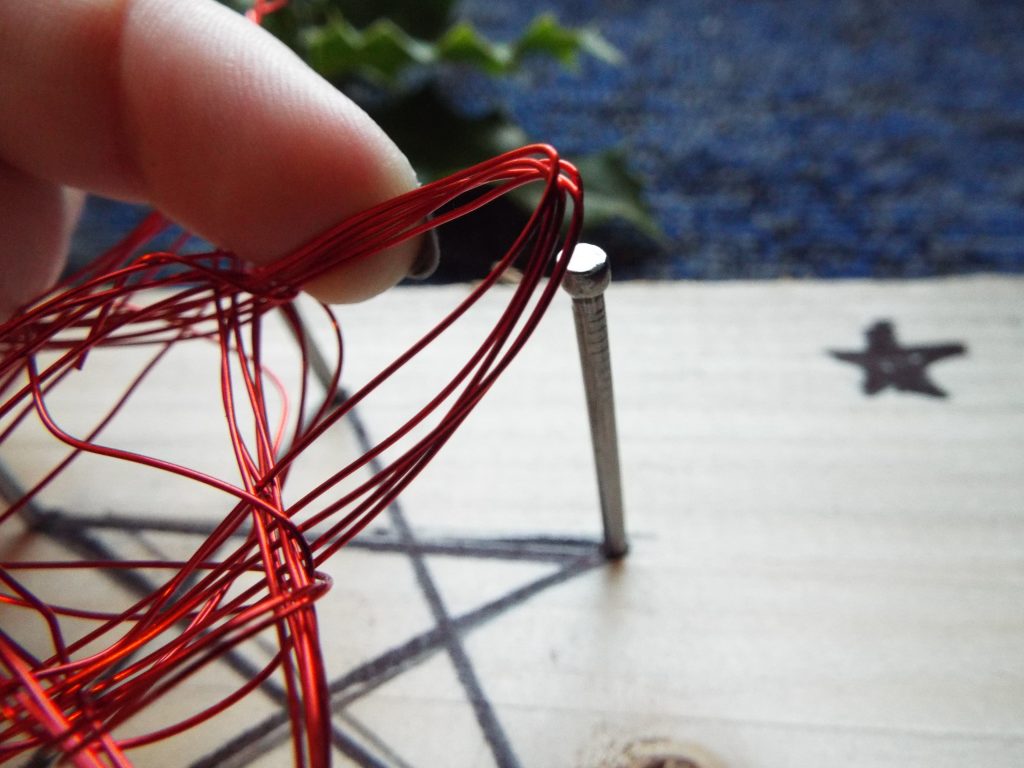 11. Now, you can carefully remove the star from the nails. When on of the ends is out, the rest come easier.
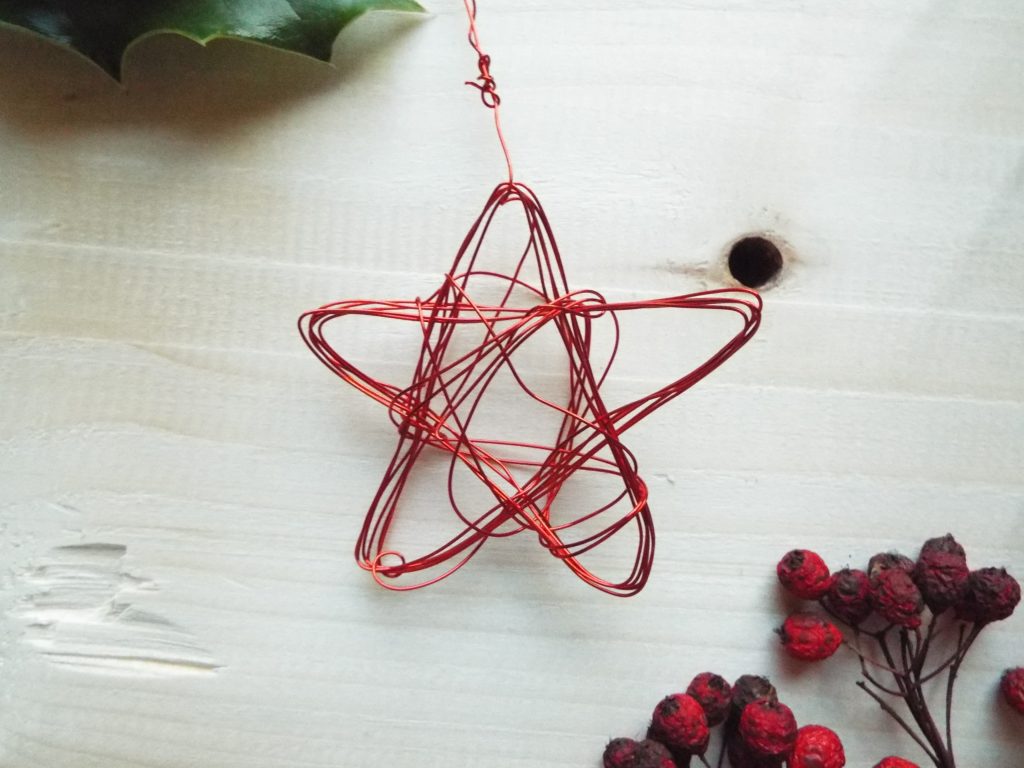 12. Finally, you can reshape it and make it nice and neat using your fingers and slight touches. And you are done!
Don`t forget to share with me your recreation on IG with #yhour
and on my FB page!